
Create a live event
This guide creates a live event that turns one source into a stream that viewers can watch. During creation, you select the source, encoding profile, recording storage, and viewing window. You can schedule the event or start it immediately after creation.
Prerequisites
Section titled “Prerequisites”- A source created in Live > Sources. See Create an SRT source.
- An encoding profile and storage option available in the Live interface.
Choose event settings
Section titled “Choose event settings”| Setting | Choose it for |
|---|---|
| Sources | The one input that this live event streams. |
| Encoding profile | The output quality and bitrate options shown by the profile picker. |
| Storage | The location where the event saves recorded content. |
| Window length | How far back viewers can watch. |
| Schedule start and stop | A planned start and stop time. |
| Start event immediately after creation | Starting the event as part of creation. |
The encoding profile determines output quality and bitrate for the renditions. For a first test, use a profile agreed for your audience and playback devices. After creation, Overview > View encoding profile shows the selected profile’s Renditions, including Name, Codec, and Bitrate, so you can check what it produces before starting.
Create the event
Section titled “Create the event”- Go to Live.
- Select New live.
- Select Create an event.
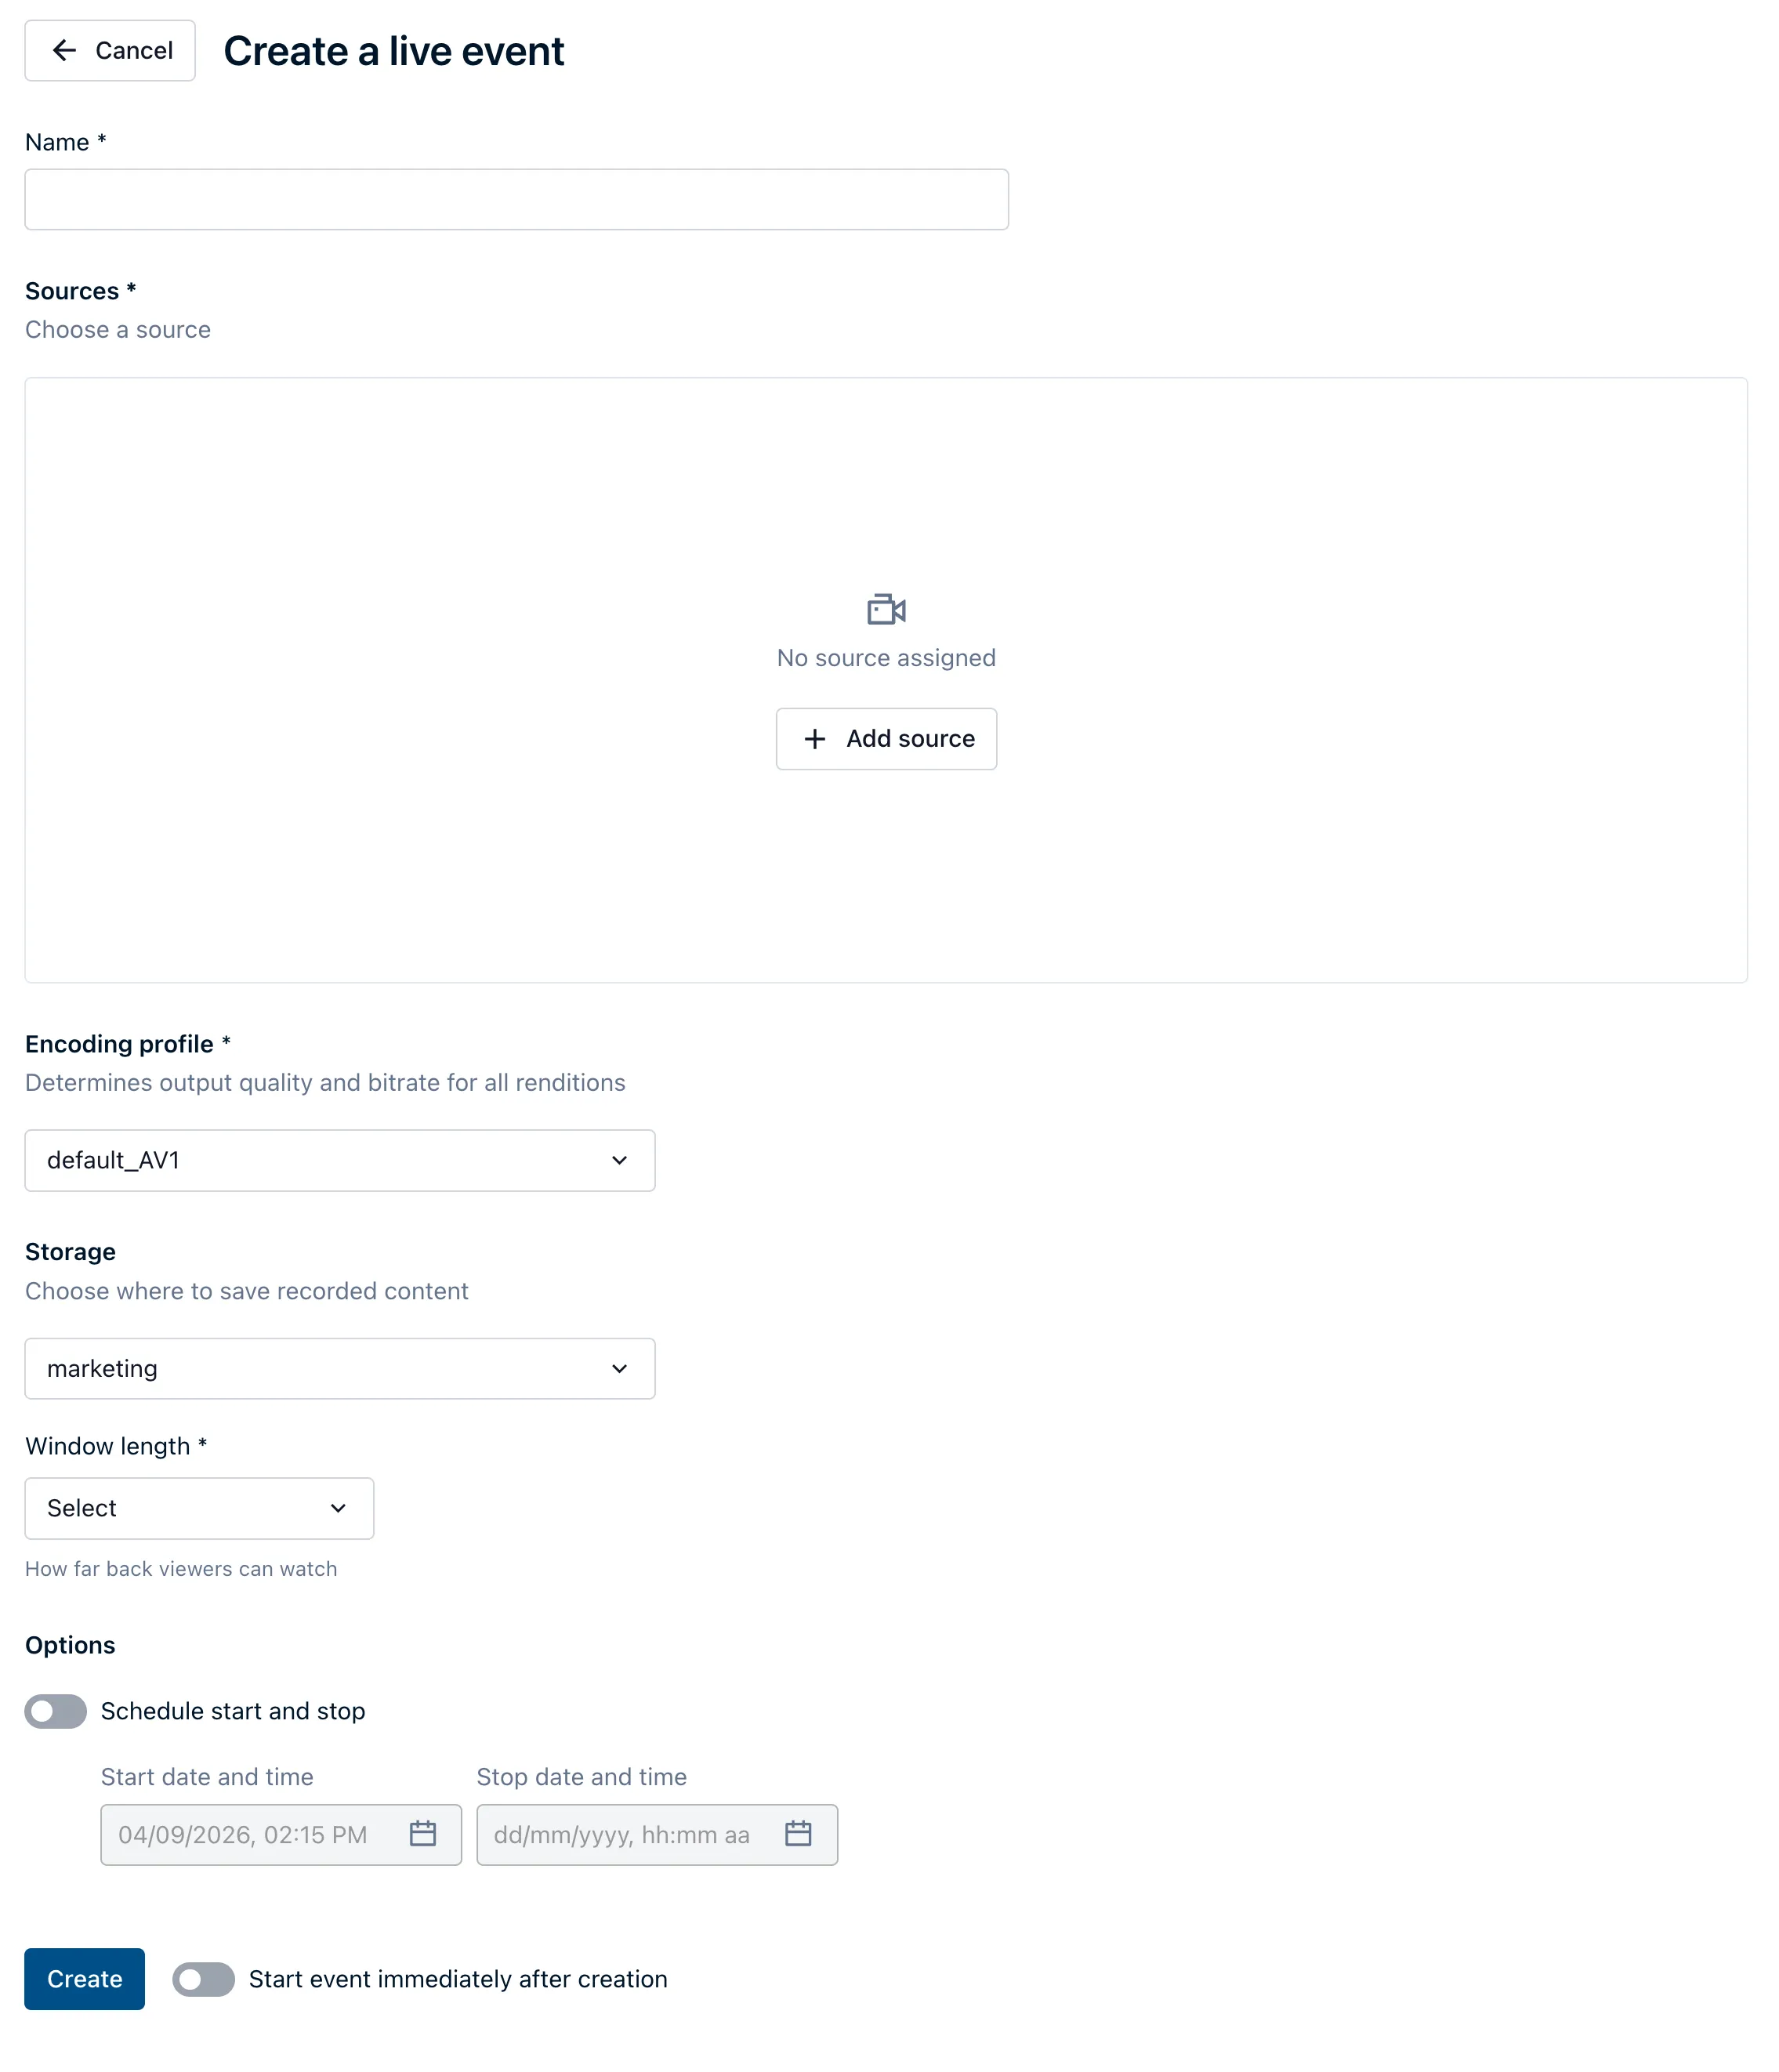
- Enter a value in Name.
- Under Sources, select Add source, then select the source you created. The source selection identifies the input used by the event.
- Under Encoding profile, select the required profile. The Live interface shows options including default_AV1, default_1080p, and default_720p.
- Under Storage, select where to save recorded content. Choose the storage location that owns the recording for this event.
- Under Window length, select how far back viewers can watch. The Live interface offers 30 minutes, 2 hours, 4 hours, 8 hours, 1 day, 10 days, and 30 days.
- To plan a broadcast, enable Schedule start and stop and enter Start date and time and Stop date and time. This keeps the planned start and end with the event configuration.
- To begin as soon as the event is created, enable Start event immediately after creation. Leave it disabled when you want to check the configuration before starting.
- Select Create.
For API options that configure live event inputs and encoding, see Manage Live resources, Live API inputs, and Live templates.
Start and verify the event
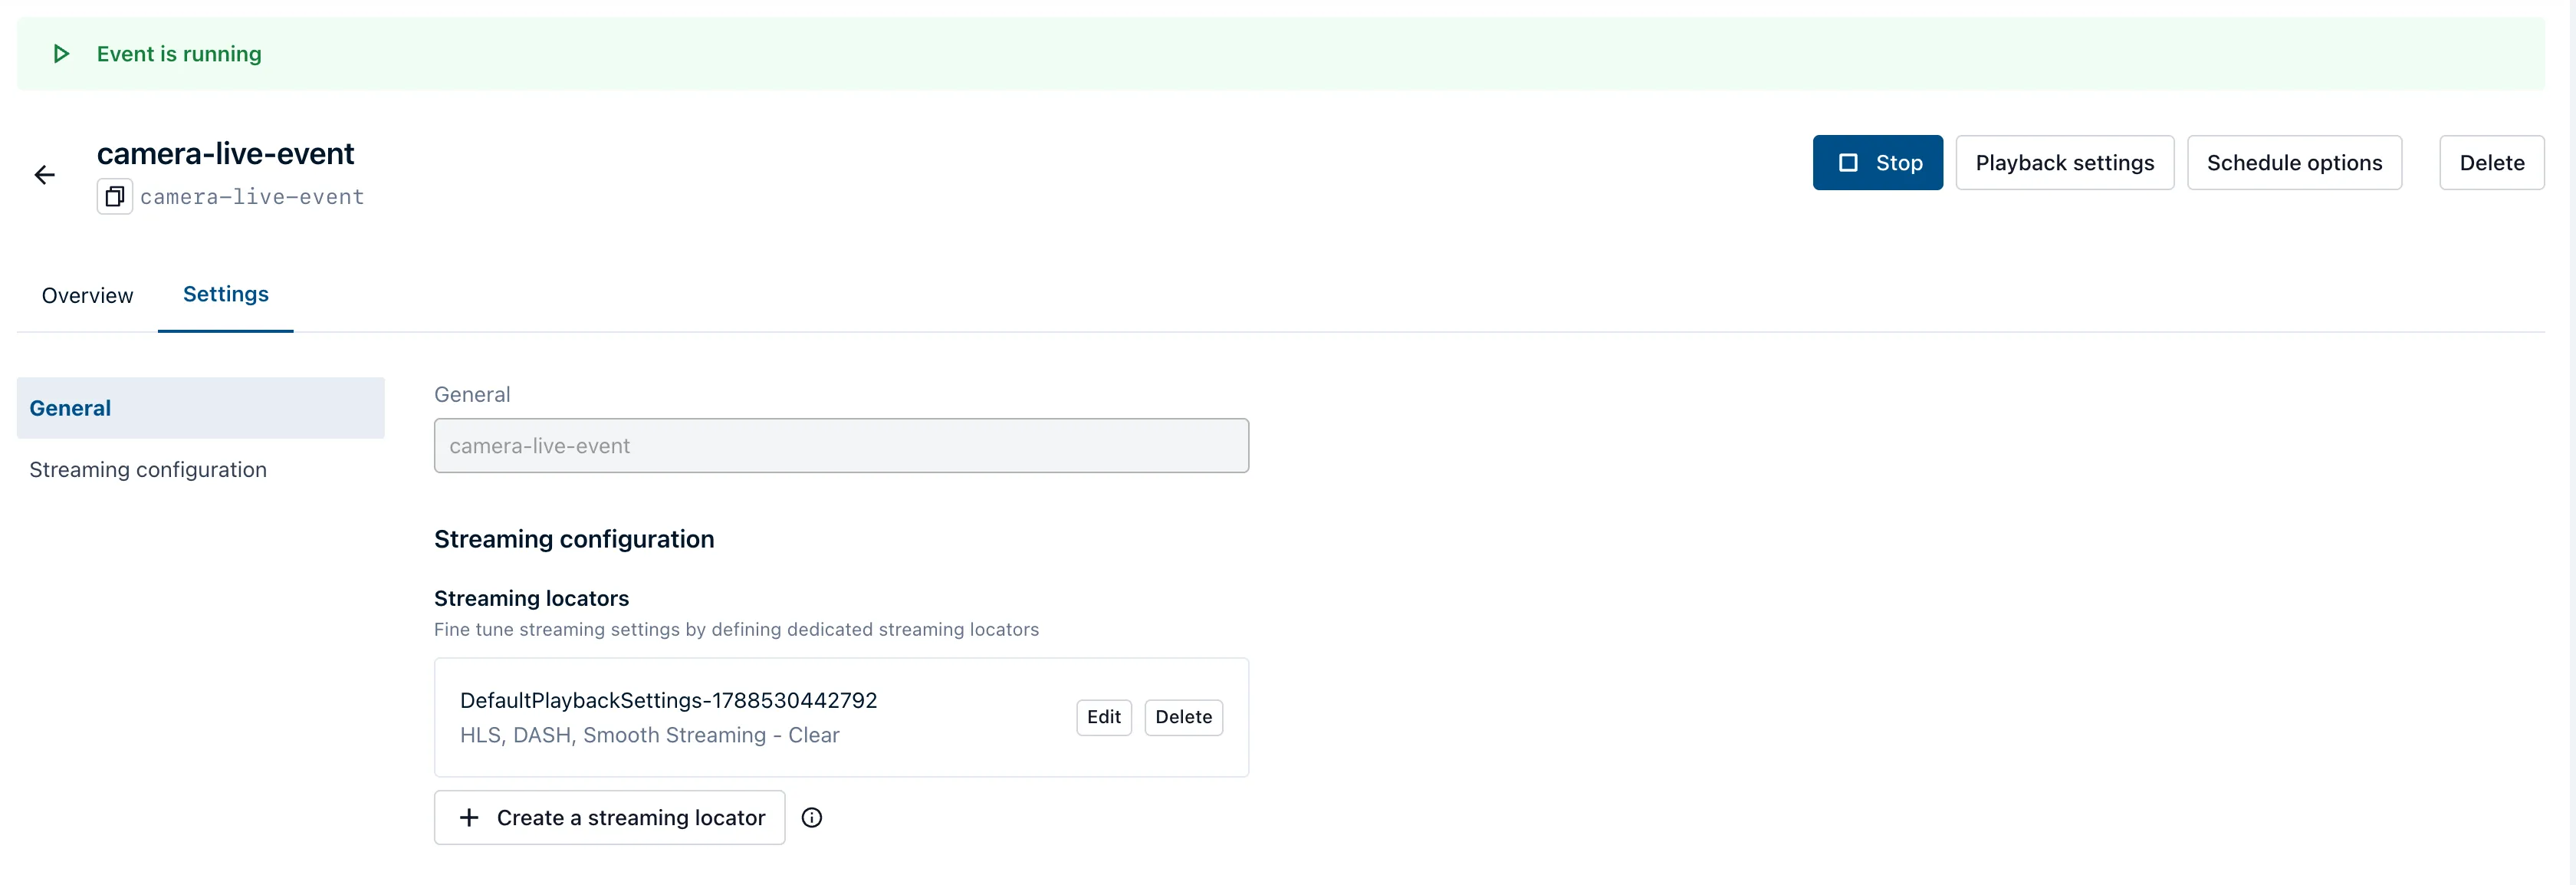
Section titled “Start and verify the event”If you did not enable Start event immediately after creation, open the event and select Start. The event page displays Event is running when the event is running. Select Overview to see the selected source, its input address, and the player.
Configure your encoder with the source address and connection settings, then begin sending the stream. In Live > Sources, Active means the source is in use; it does not prove that media is arriving. Complete the playback checks below to verify the broadcast.
View and manage the event
Section titled “View and manage the event”Open Live and select the event from the Live tab. The event page has Overview and Settings tabs.
- Use Overview to view the selected source and event player.
- Select Settings to view General and Streaming configuration. The streaming configuration includes Streaming locators.
- Select Playback settings to manage streaming locators.
- Select Schedule options to manage the event schedule.
- Select Stop to stop a running event, or Delete to remove the event.
Create a streaming locator
Section titled “Create a streaming locator”Select Playback settings on the event page to manage the streaming locators shown for the event.
- Select Playback settings.
- Select Customize playback settings to open Settings.
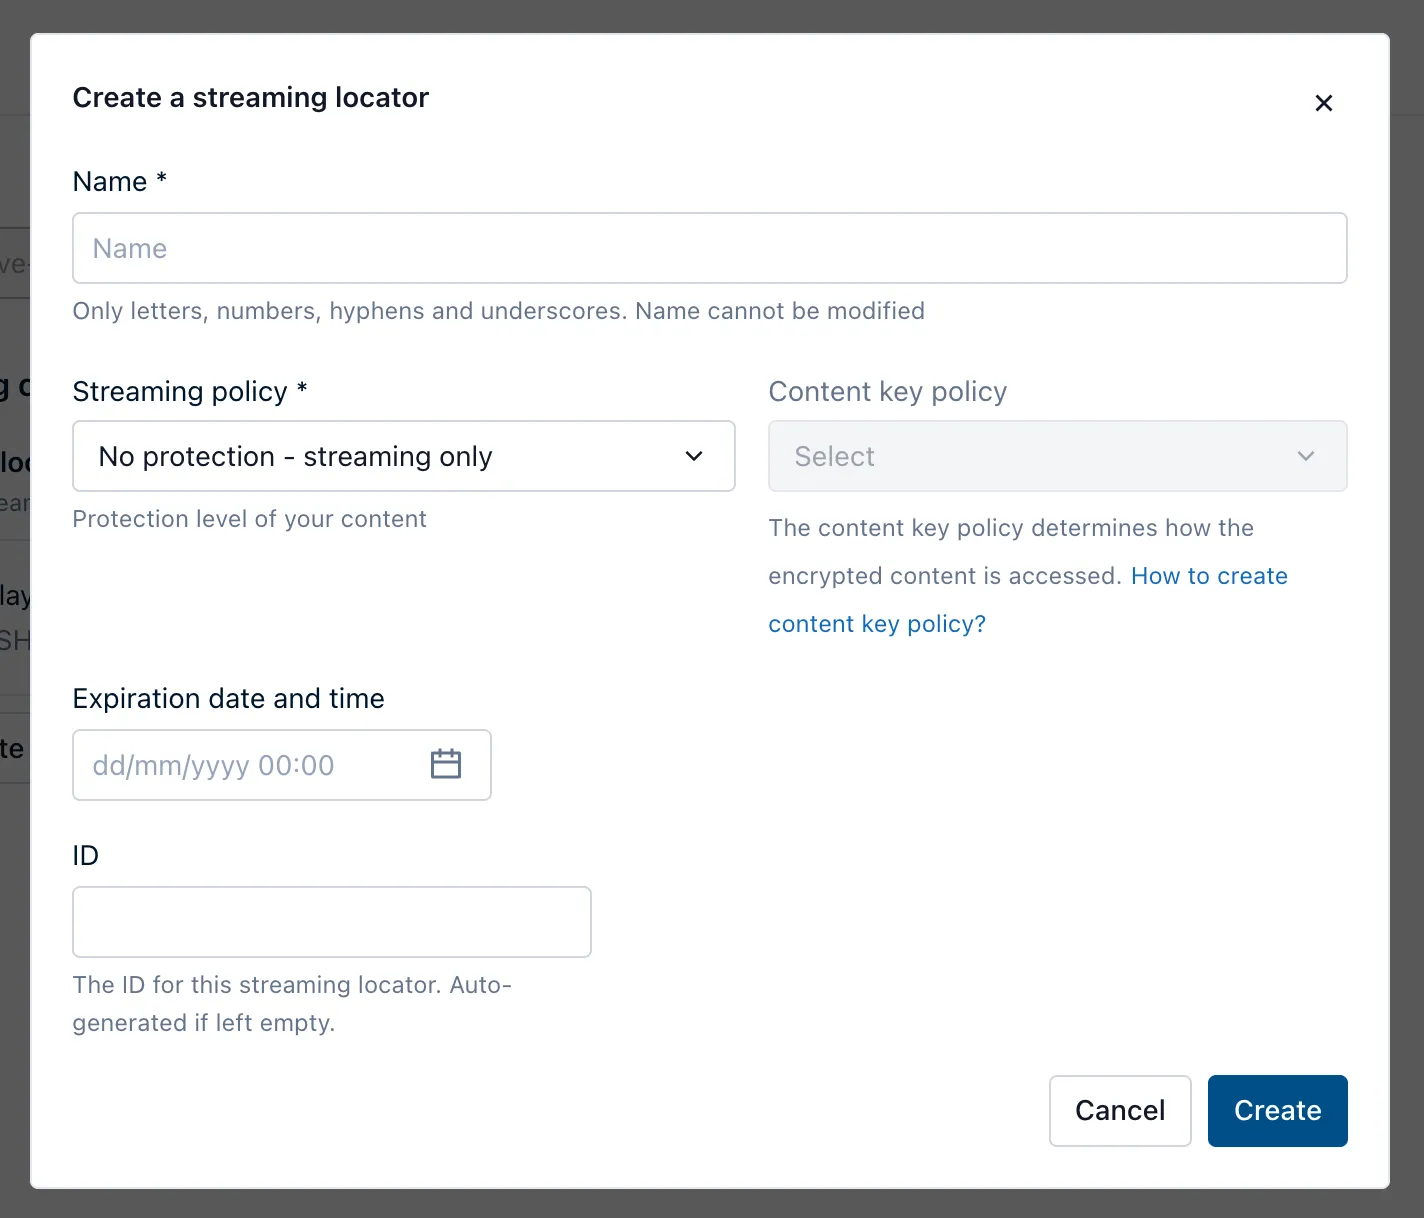
- Under Streaming locators, select Create a streaming locator.
- Enter a value in Name.
- Select the required Streaming policy. Select a Content key policy when your playback policy uses one.
- Optionally enter an Expiration date and time.
- Select Create.
For locator and streaming endpoint automation, see Publishing with the Media API.
For the endpoint and publishing model, see Publish content for streaming.
Copy a playback URL and verify the stream
Section titled “Copy a playback URL and verify the stream”- Open the event and select Playback settings.
- Select HLS streaming URL for HTTP Live Streaming (HLS), or DASH streaming URL for Dynamic Adaptive Streaming over HTTP (DASH), to copy the playback address for the locator.
- Open that address in a player that supports the selected format and streaming policy.
- Confirm that the picture updates and that the expected audio is present. A running event or a loaded player alone does not establish that the current source is reaching viewers.
Use Overview to compare the event’s player with the expected source. If playback fails, follow Troubleshoot Live playback.
Finish a test
Section titled “Finish a test”Select Stop on the event when the test ends, then check that its Status in the Live list is Stopped. Stop your contribution encoder too. If you started a streaming endpoint only for this test, follow Stop the test resources after checking that no other streams use it. A shared endpoint may still be serving other viewers.
What comes next
Section titled “What comes next”If the source remains inactive or the player cannot load playback, use Troubleshoot Live playback.
For an automated equivalent, follow the Live event walkthrough. It creates the source through the Media API, references an encoding template, and creates the event through the Live API.