
Create a multiview live event
A multiview live event presents several sources in a single output. Choose a layout first, then assign a source to each tile. The event uses one encoding profile, recording location, and viewer window for the composed output.
Prerequisites
Section titled “Prerequisites”- The required sources created in Live > Sources.
- An encoding profile and storage option available in the Live interface.
Plan the layout
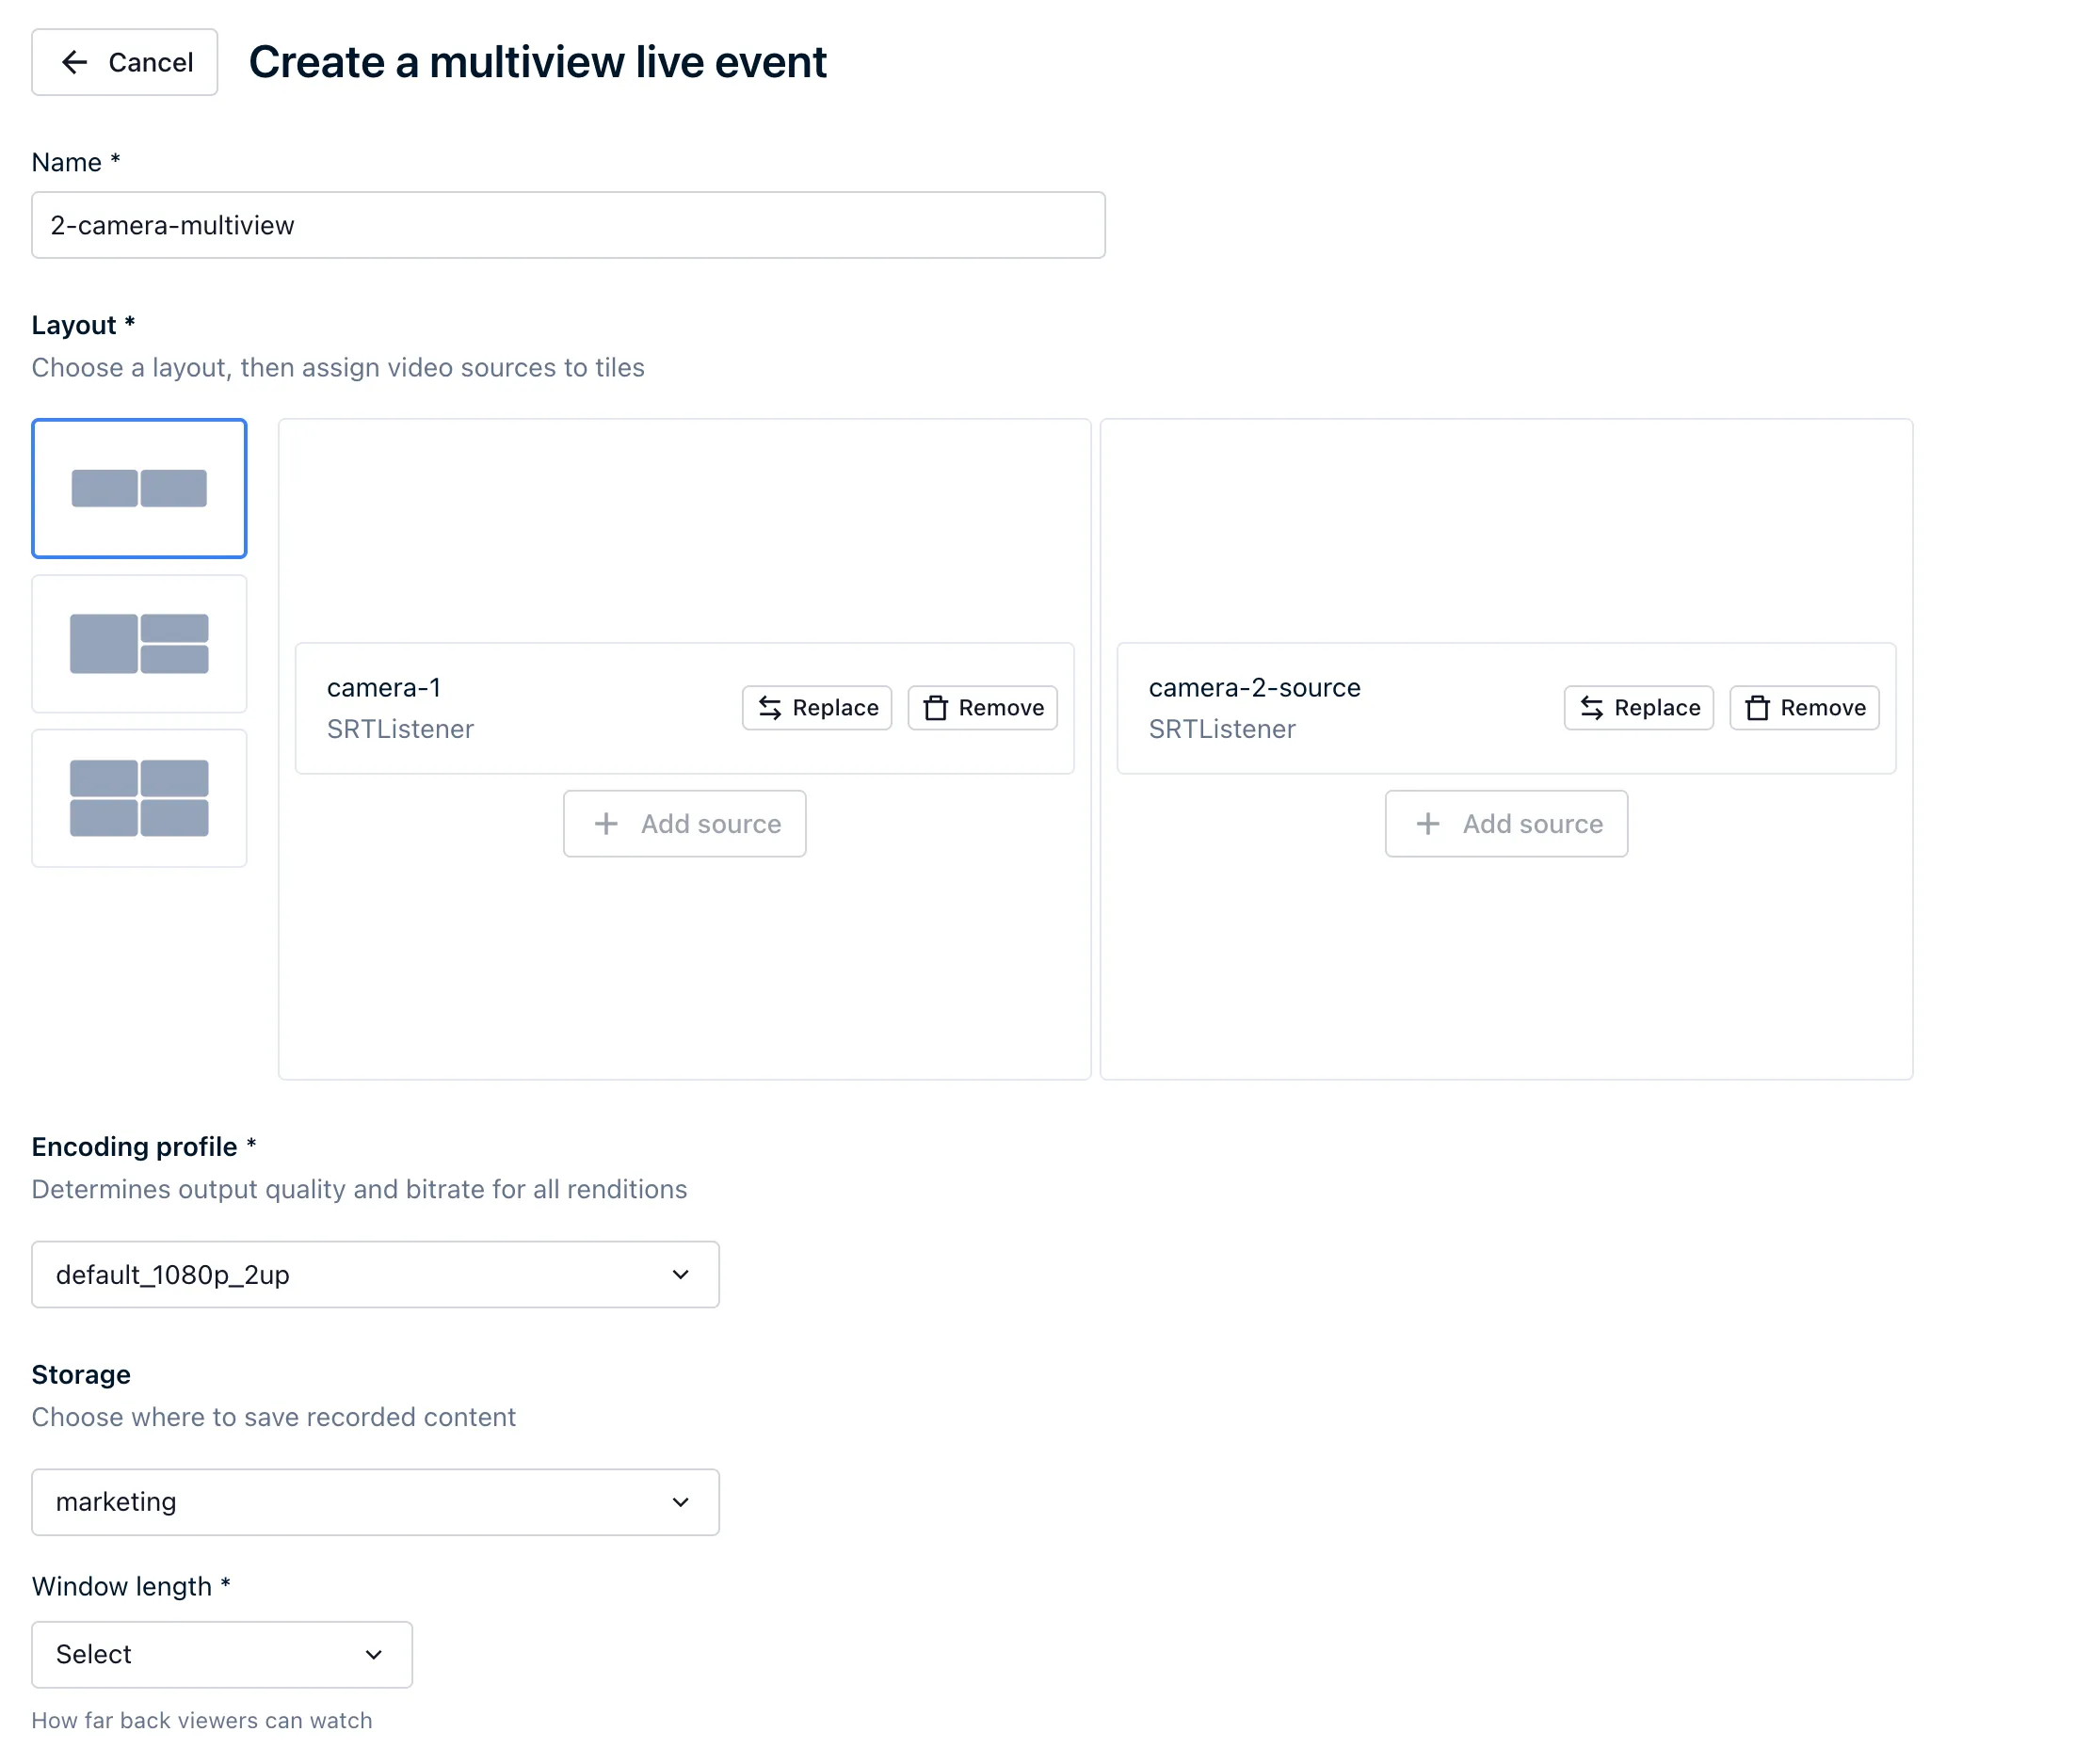
Section titled “Plan the layout”The layout picker shows the tile arrangement before you add sources. Select a layout that gives every required source a tile, then assign the sources in the order you want them displayed. The creation page provides layouts for two, three, and four tiles.
Create all the required sources before you open this page. This keeps the layout assignment step focused on choosing the right source for each tile rather than interrupting event creation to configure ingest.
For API configuration of multiview inputs and composition, see Multiview and Live API inputs.
Create the multiview event
Section titled “Create the multiview event”- Go to Live.
- Select New live.
- Select Create a multiview event.
- Enter a value in Name.
- Under Layout, select the layout that has the tiles you need. The available layout cards show the tile arrangement before you assign a source.
- In each tile, select Add source and choose the source to assign to that tile. Before creation, select Replace to choose a different source or Remove to clear the tile.
- Under Encoding profile, select the output profile for the composed multiview stream.
- Under Storage, select where to save recorded content.
- Under Window length, select how far back viewers can watch.
- Optionally enable Schedule start and stop, then enter the event dates and times.
- To begin as soon as the event is created, enable Start event immediately after creation. Leave it disabled when you want to confirm the layout and source assignments before starting.
- Select Create.
For API options that control live event resources, sources, and encoding configuration, see Manage Live resources and Live templates.
Start and verify the event
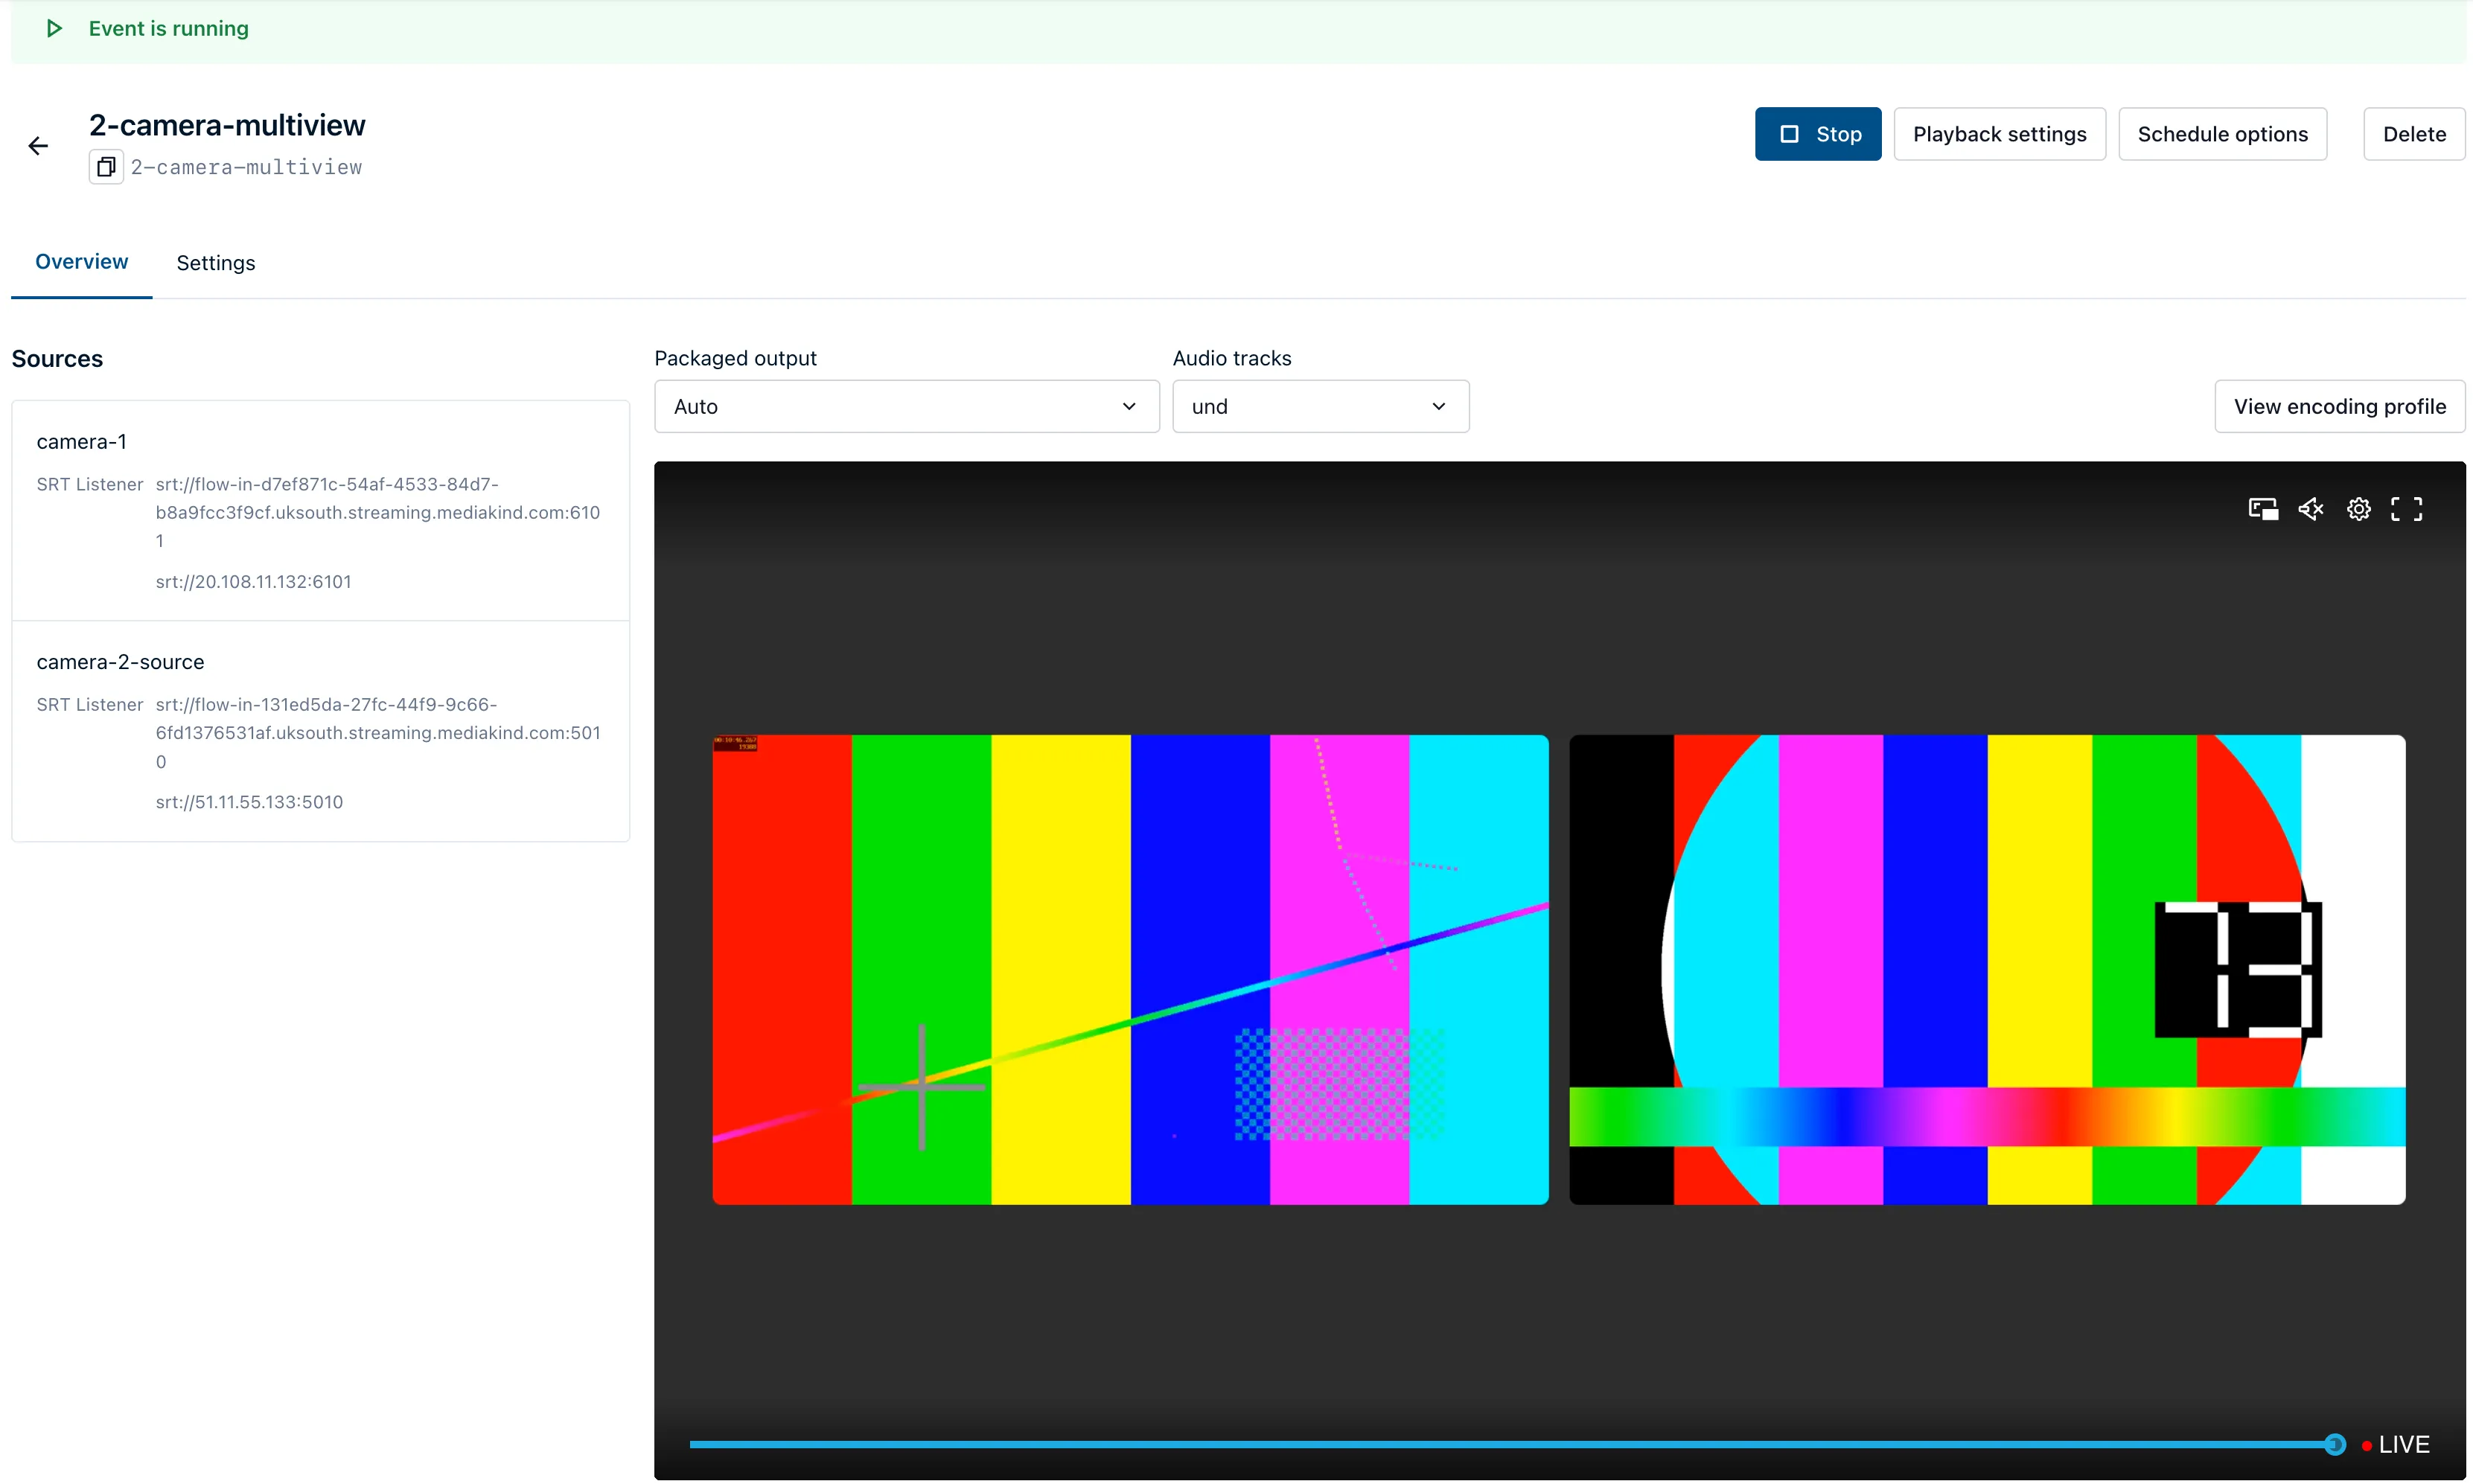
Section titled “Start and verify the event”If you did not enable Start event immediately after creation, open the new event and select Start. The Live interface shows Event is running when it is running. On Overview, the source list and player show the assigned inputs and the composed multiview output.
Check each assigned source in Live > Sources. Active means a source is in use. Verify the composed picture as well: every tile should show its expected source and update as that source changes.
For API monitoring options, see Monitor live resources.
Configure playback
Section titled “Configure playback”Open Settings > Streaming configuration to manage the event’s Streaming locators. Follow Create a streaming locator, then start the streaming endpoint before you expect playback to work.
Publish content for streaming explains streaming endpoints and locators.
For locator and streaming endpoint automation, see Publishing with the Media API.
Verify playback and finish the test
Section titled “Verify playback and finish the test”Follow Copy a playback URL and verify the stream. Check every tile and the expected audio in the composed output. A working tile does not prove that the other sources are receiving media.
When testing is complete, follow Finish a test to stop the event and any delivery resources dedicated to the test.
What comes next
Section titled “What comes next”Use Troubleshoot Live playback if a source is inactive or the player cannot load playback.
To automate the same workflow, follow the Multiview walkthrough. Use Manage templates when you need to create or adjust the encoding and composition templates that the Live API resources reference.