
Create a reception channel
A Reception (Decoding) channel receives a transport stream, optionally decrypts it, decodes the video and audio, and presents the result as baseband. Use it when content arrives over satellite, ASI, IP, or SRT and needs to come back out as SDI or SMPTE ST 2110.
Reception channels are created in the same wizard as every other channel, so read Create a channel first for the parts that do not change. This page covers only what is specific to Reception (Decoding).
The steps differ from an encoding channel because nothing is re-encoded. Instead of Encoding and Audio steps, the wizard shows Decrypt, Decoding, and Decoded Output:
Name > Workflow > Input > Decrypt > Decoding > Decoded Output
-
Choose the workflow
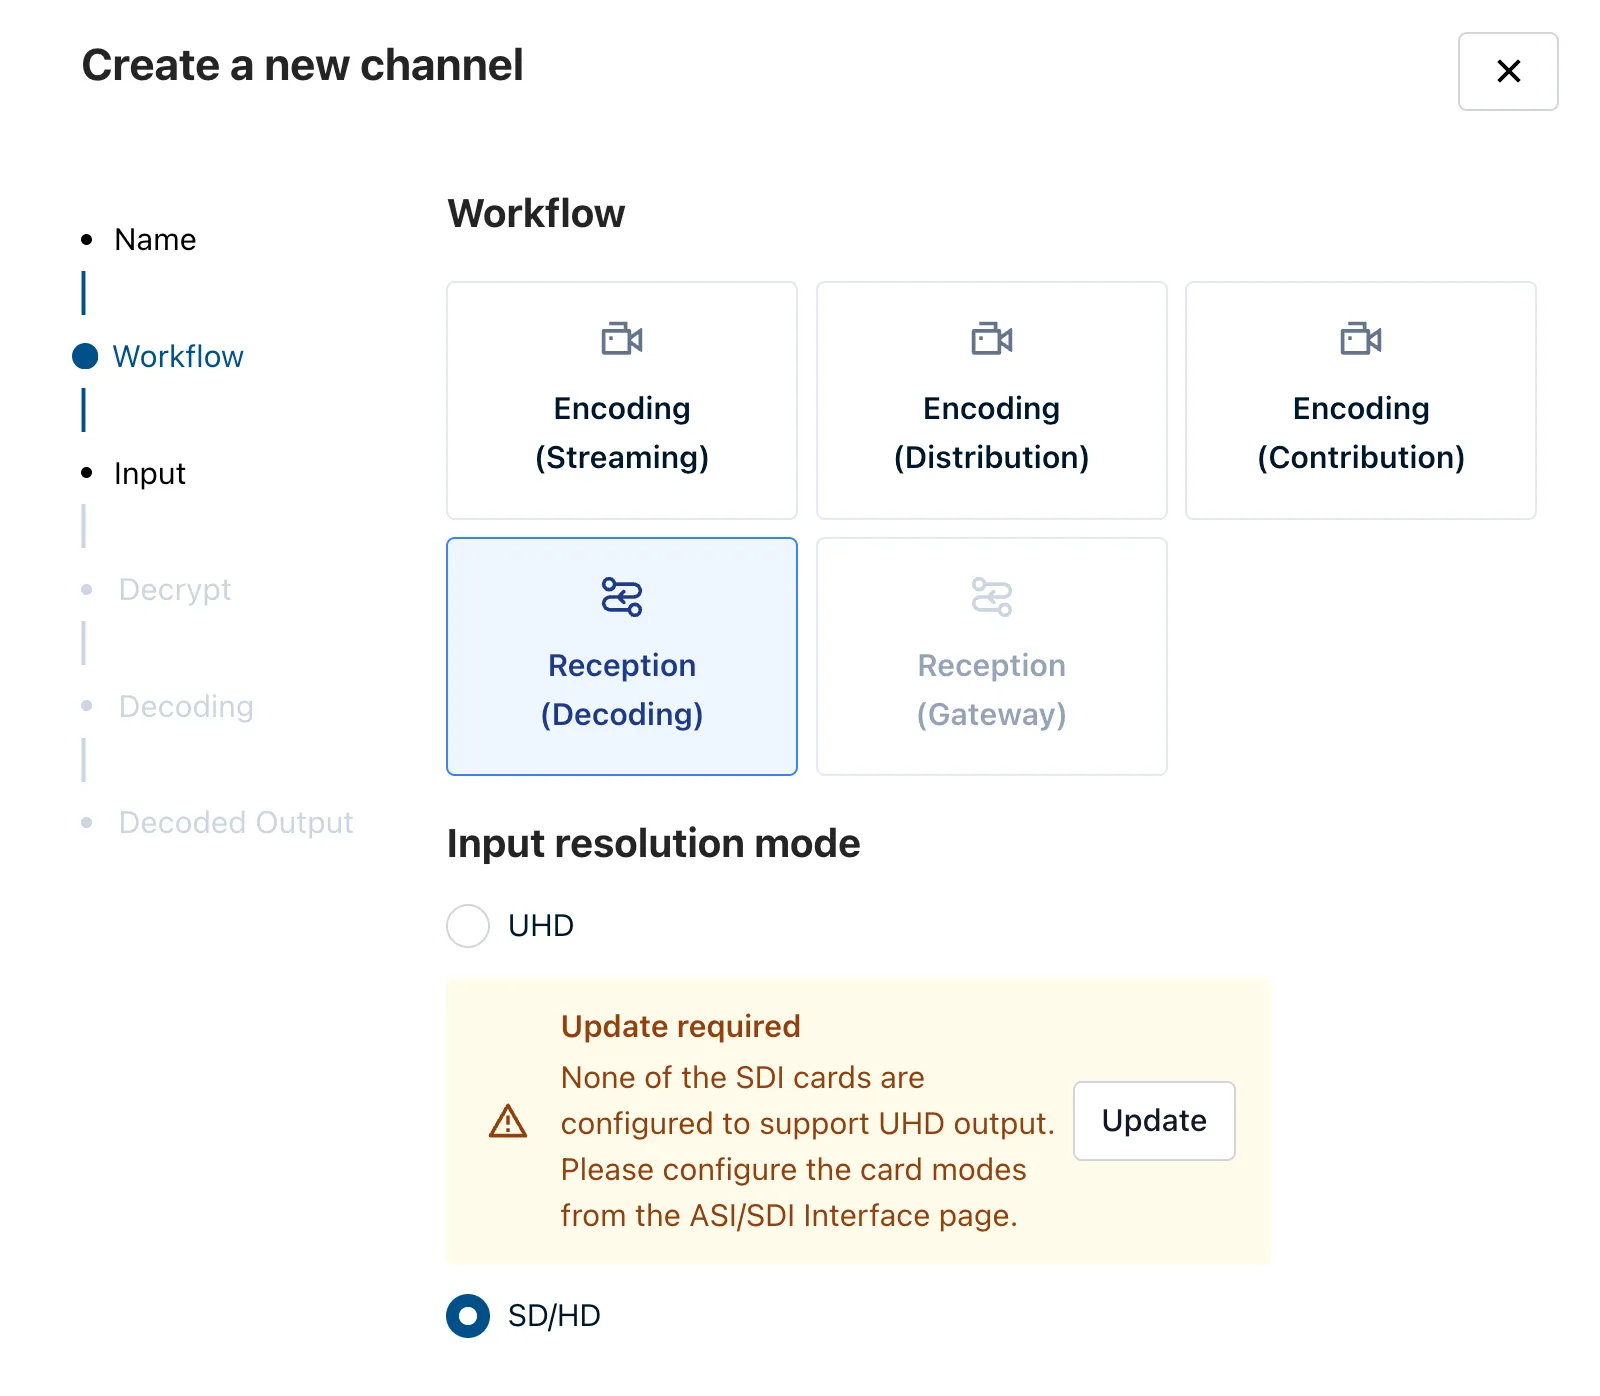
Select Reception (Decoding), then choose an Input resolution mode of UHD or SD/HD.
If the device has no SDI card configured for UHD, selecting UHD shows an Update required notice: “None of the SDI cards are configured to support UHD output. Please configure the card modes from the ASI/SDI Interface page.” Use Update to go to that page, or choose SD/HD instead.
Reception (Gateway) is greyed out, because it is not yet available.
Select Next.
-
Select the input
Choose the transport the stream arrives on: SRT (Secure Reliable Transport), IP, ASI (Asynchronous Serial Interface), or Satellite.
Choosing SRT reveals a second choice between SRT Listener and SRT Caller, and the connection fields for whichever you pick. For SRT Listener:
Field Notes Listener interface The network interface on the device that accepts the connection. Listener port The port the device listens on, for example 3000.Encryption Defaults to None. Latency Defaults to 125ms.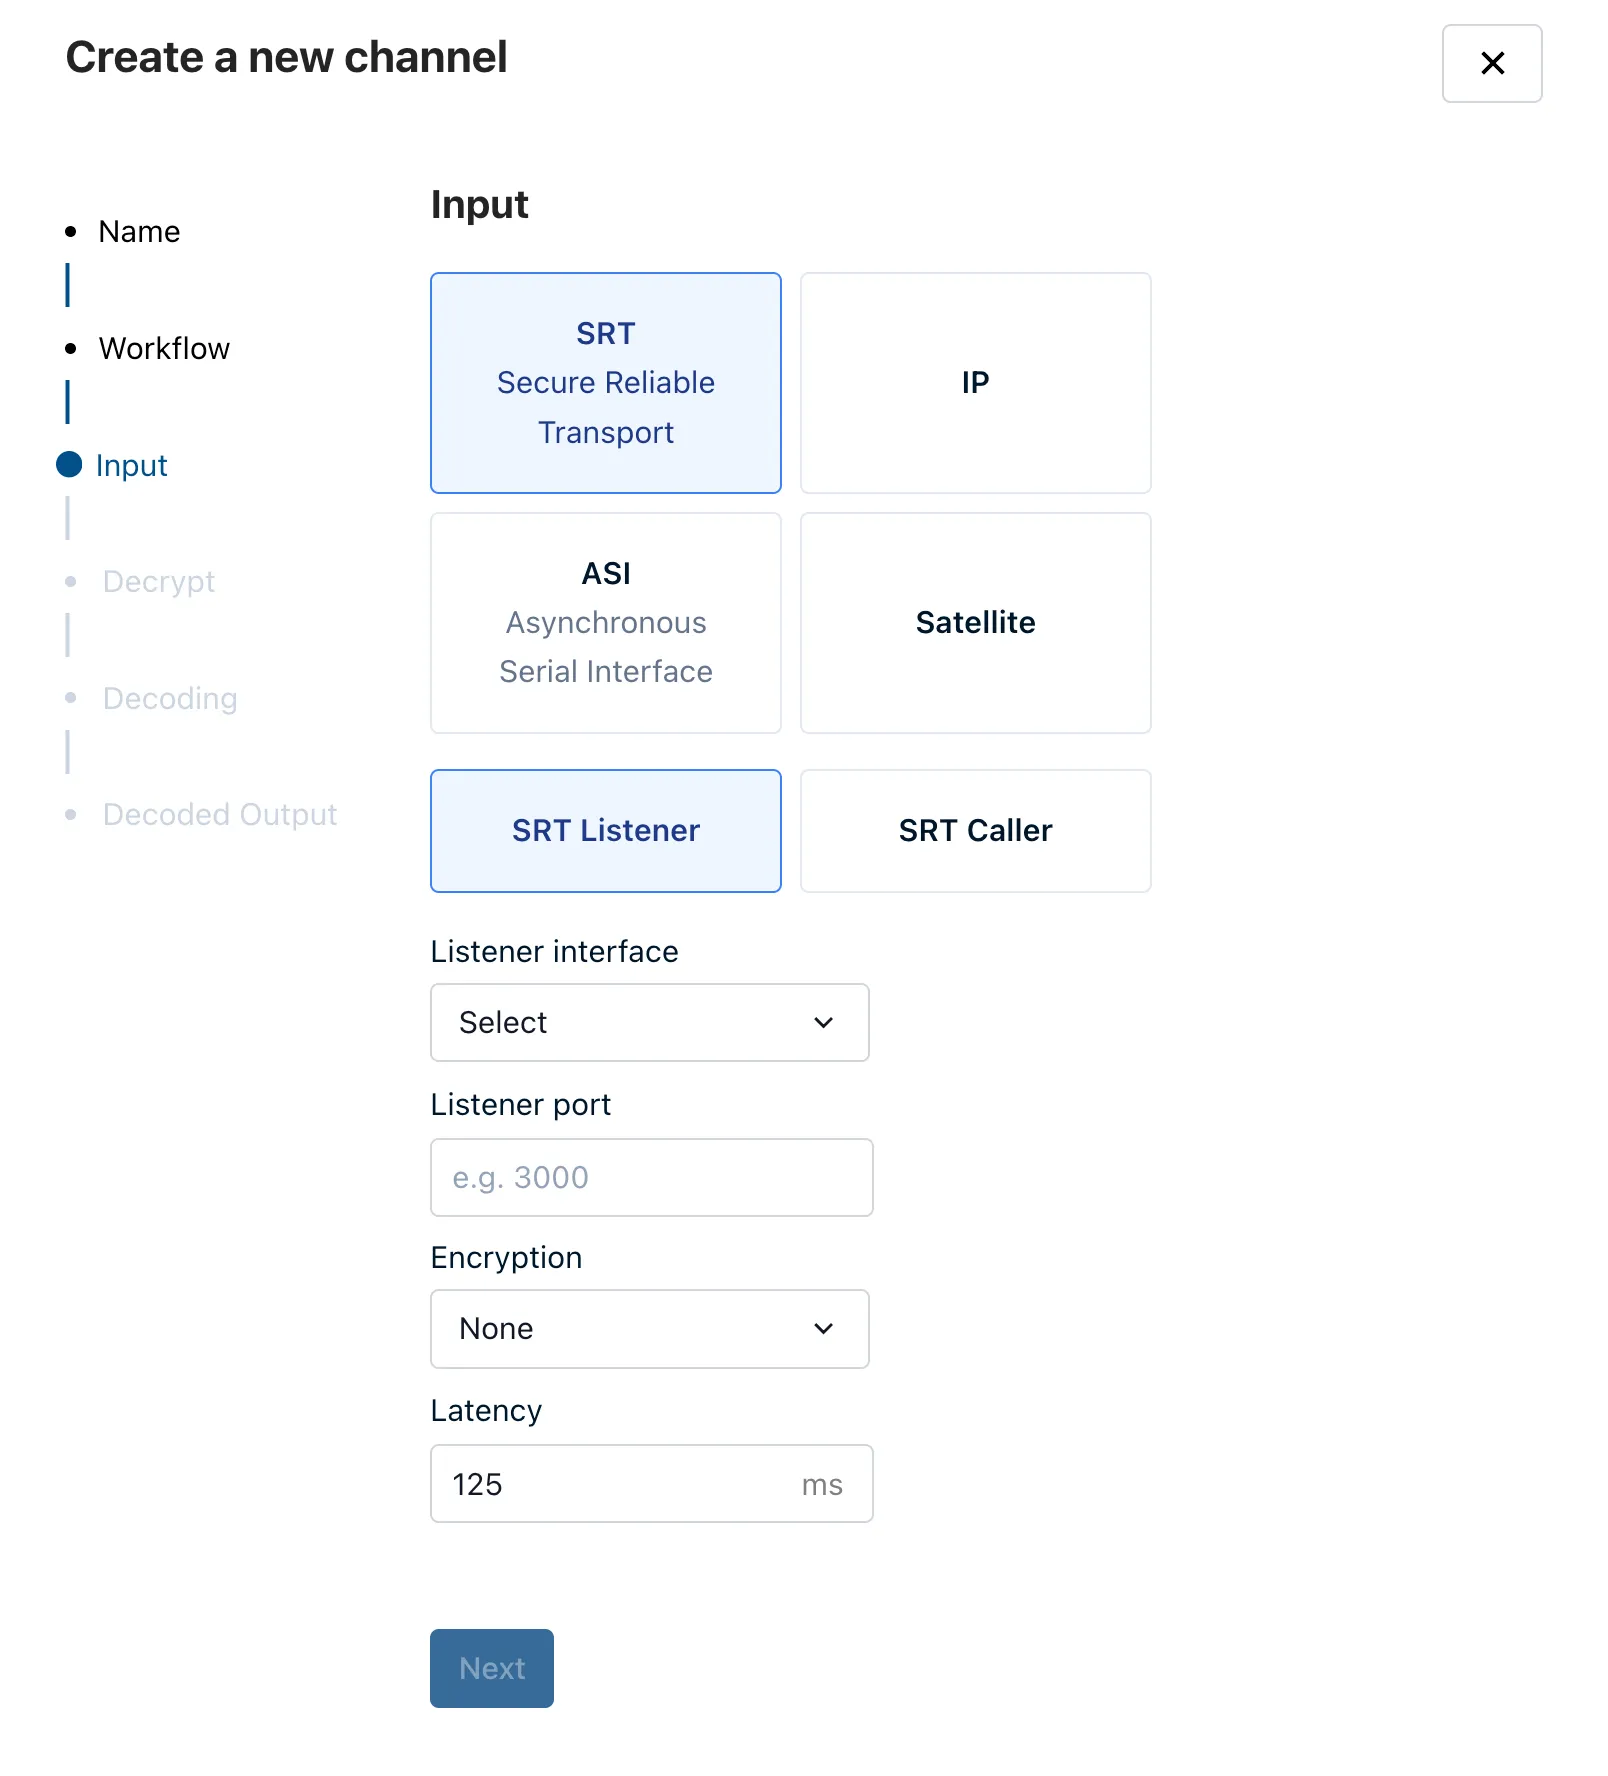
Select Next.
-
Choose the decryption method
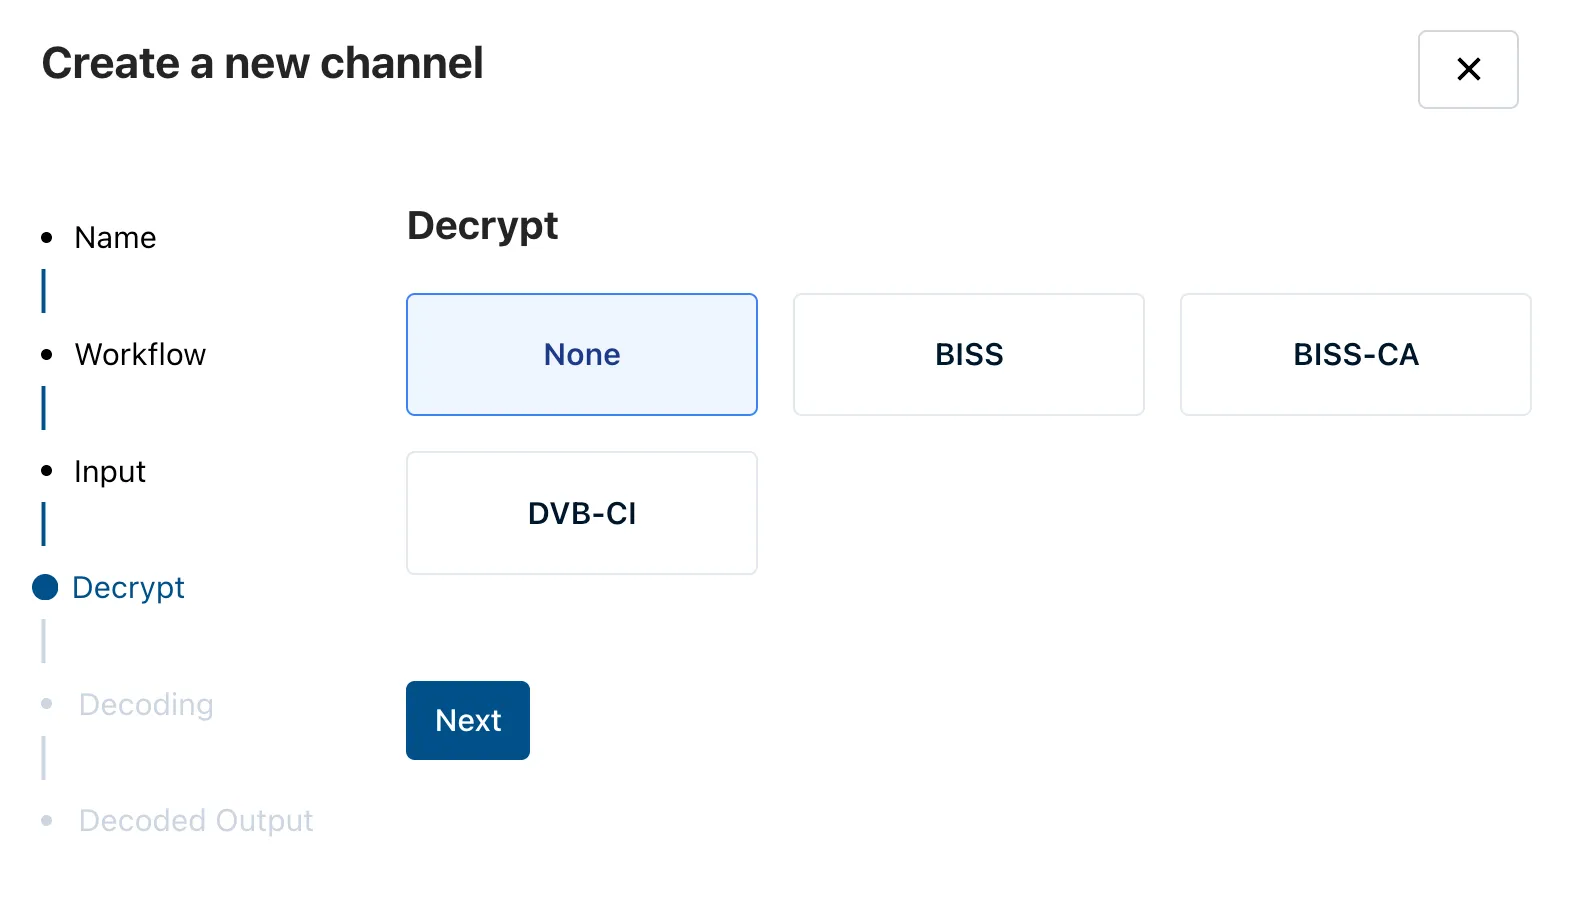
Select how the incoming stream is protected: None, BISS, BISS-CA, or DVB-CI. Choose None for an unencrypted source.
Select Next.
-
Configure decoding
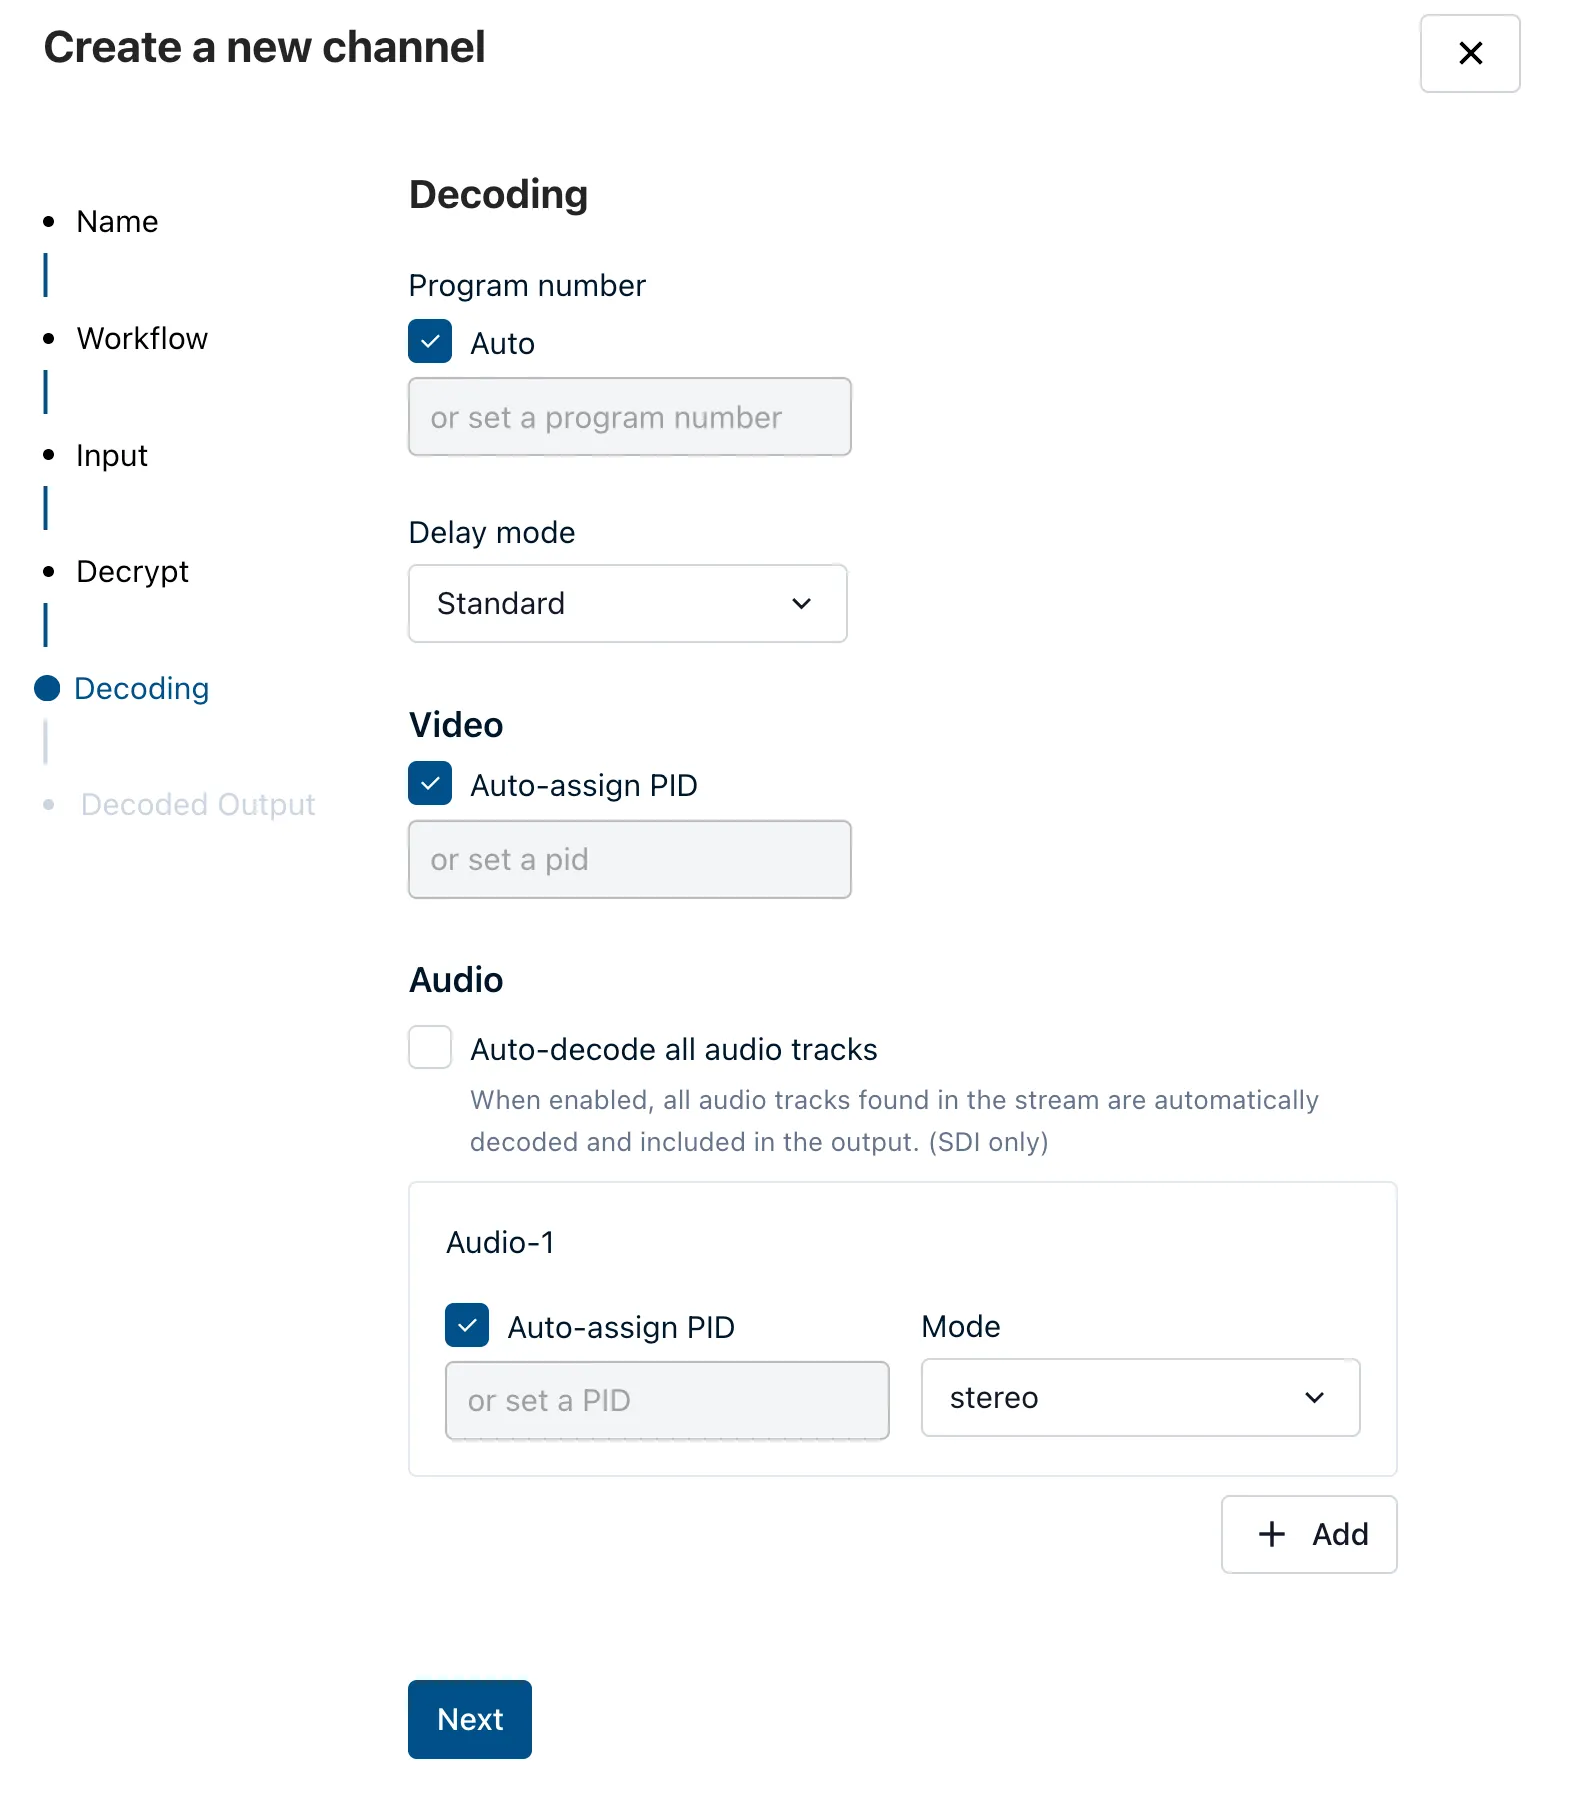
This step selects which program and elementary streams to decode.
Program number takes Auto, which is selected by default, or a specific program number. Delay mode defaults to Standard.
Under Video, Auto-assign PID is selected by default, or you can set a PID.
Under Audio, Auto-decode all audio tracks decodes every audio track found in the stream and includes it in the output. The wizard notes that this applies to SDI only. Leave it clear to configure tracks individually: each track has its own Auto-assign PID and a Mode, and + Add adds another.
Select Next.
-
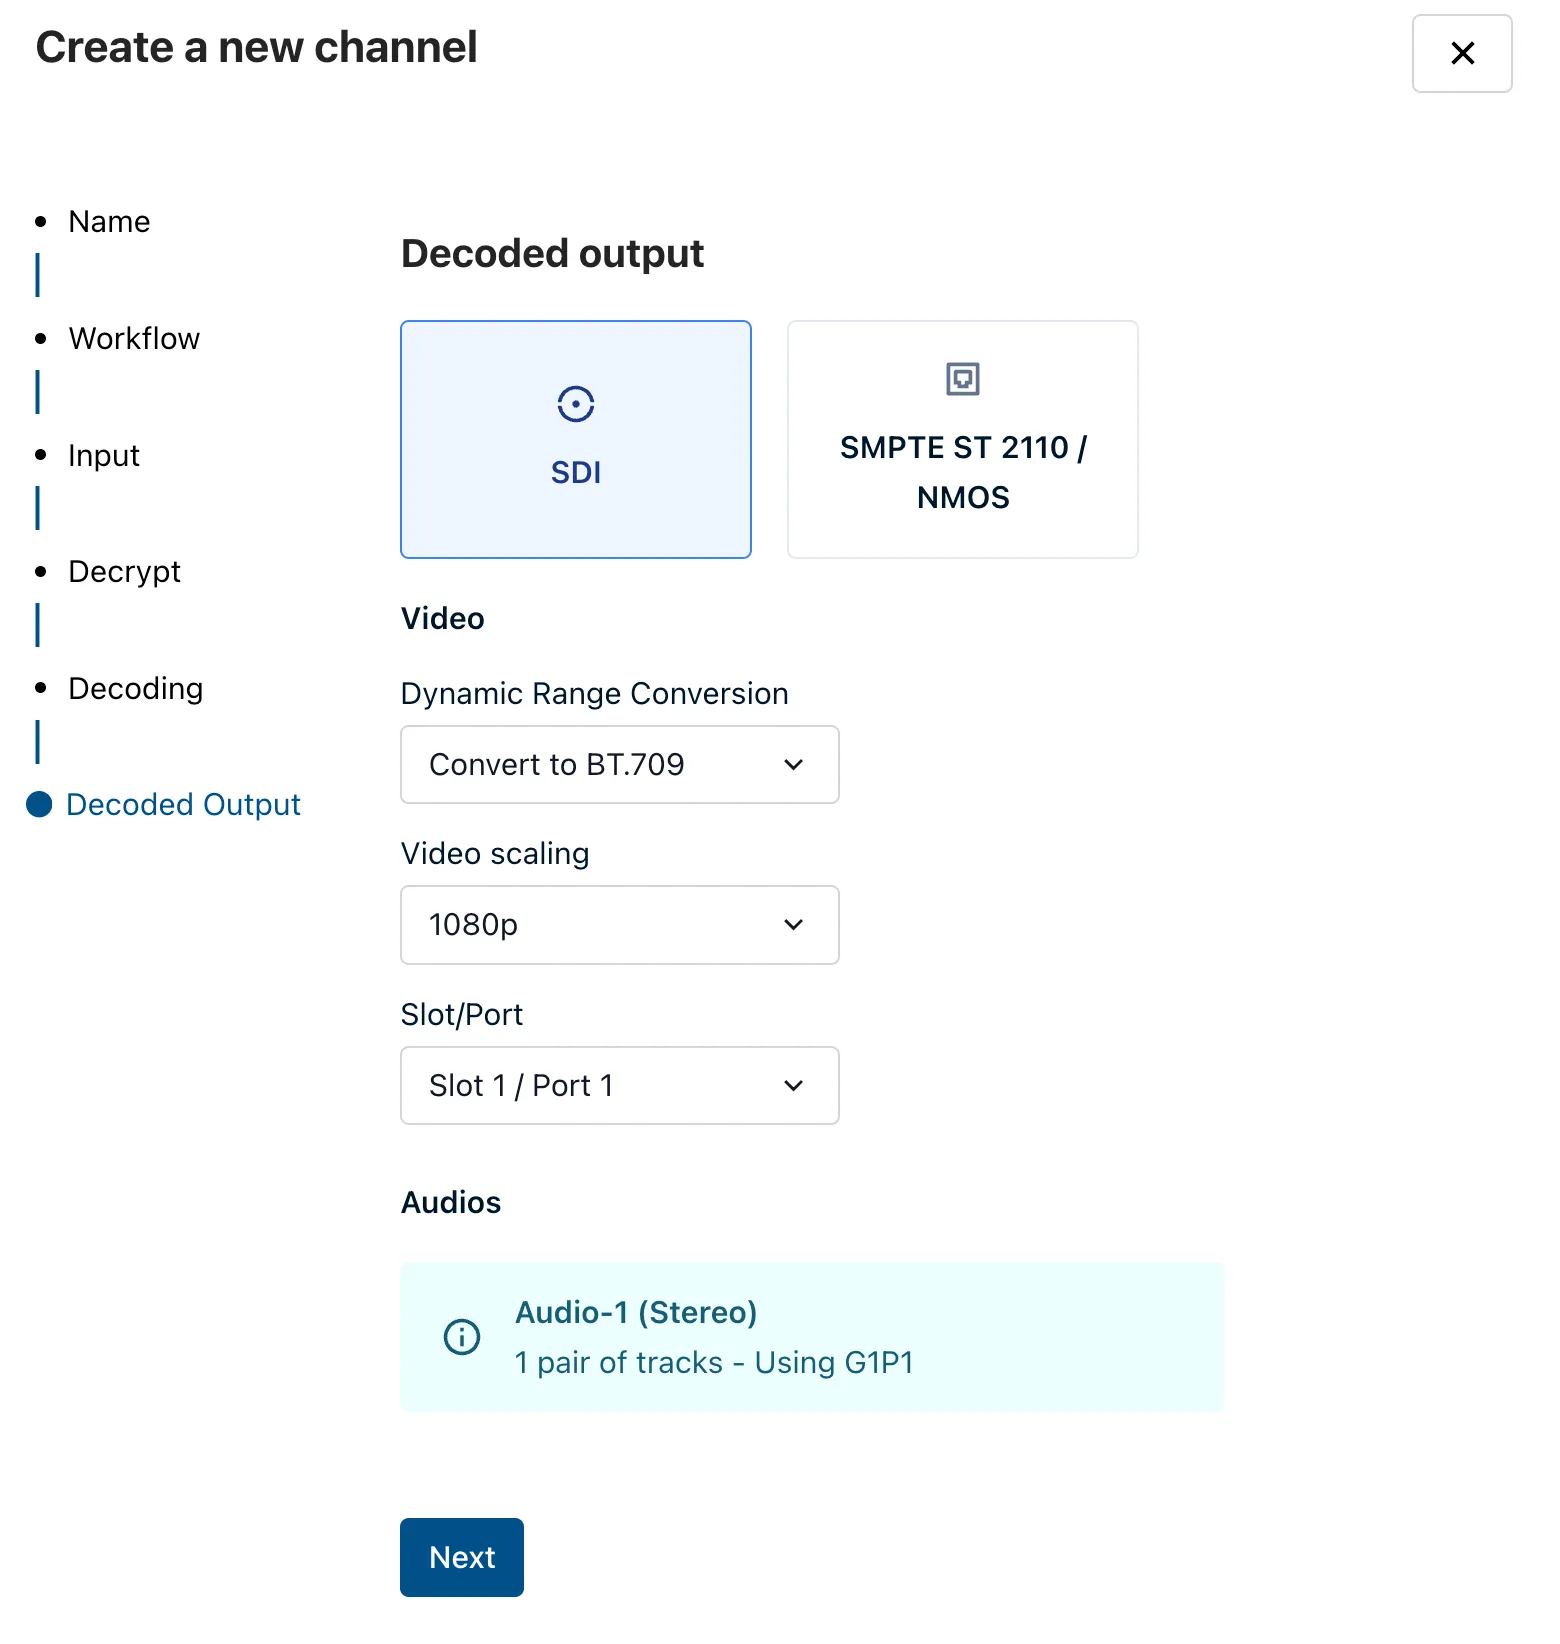
Configure the decoded output
Choose SDI or SMPTE ST 2110 / NMOS. Both carry the same Video settings, and differ in how the output is addressed.
Common to both:
Field Notes Dynamic Range Conversion None, or Convert to BT.709. Video scaling None, or a target such as 1080p. For SDI, choose the Slot/Port to output on. The Audios panel below is read-only and reflects what you configured in the Decoding step, for example “Audio-1 (Stereo), 1 pair of tracks - Using G1P1”.
For SMPTE ST 2110 / NMOS, address the output on the network instead:
Field Notes Destination IP address Output stream unicast or multicast IPv4 address, for example 239.1.1.1.Destination port For example 5005.Network interface The interface the output leaves on. Auto source port Selected by default. Clear it to set the source port yourself. There is no multicast option to select here: an address in the class D range,
224.0.0.0/4, is treated as multicast, and anything outside that range is treated as unicast. The Advanced interface offers an explicit Unicast control where an exception to that check is needed.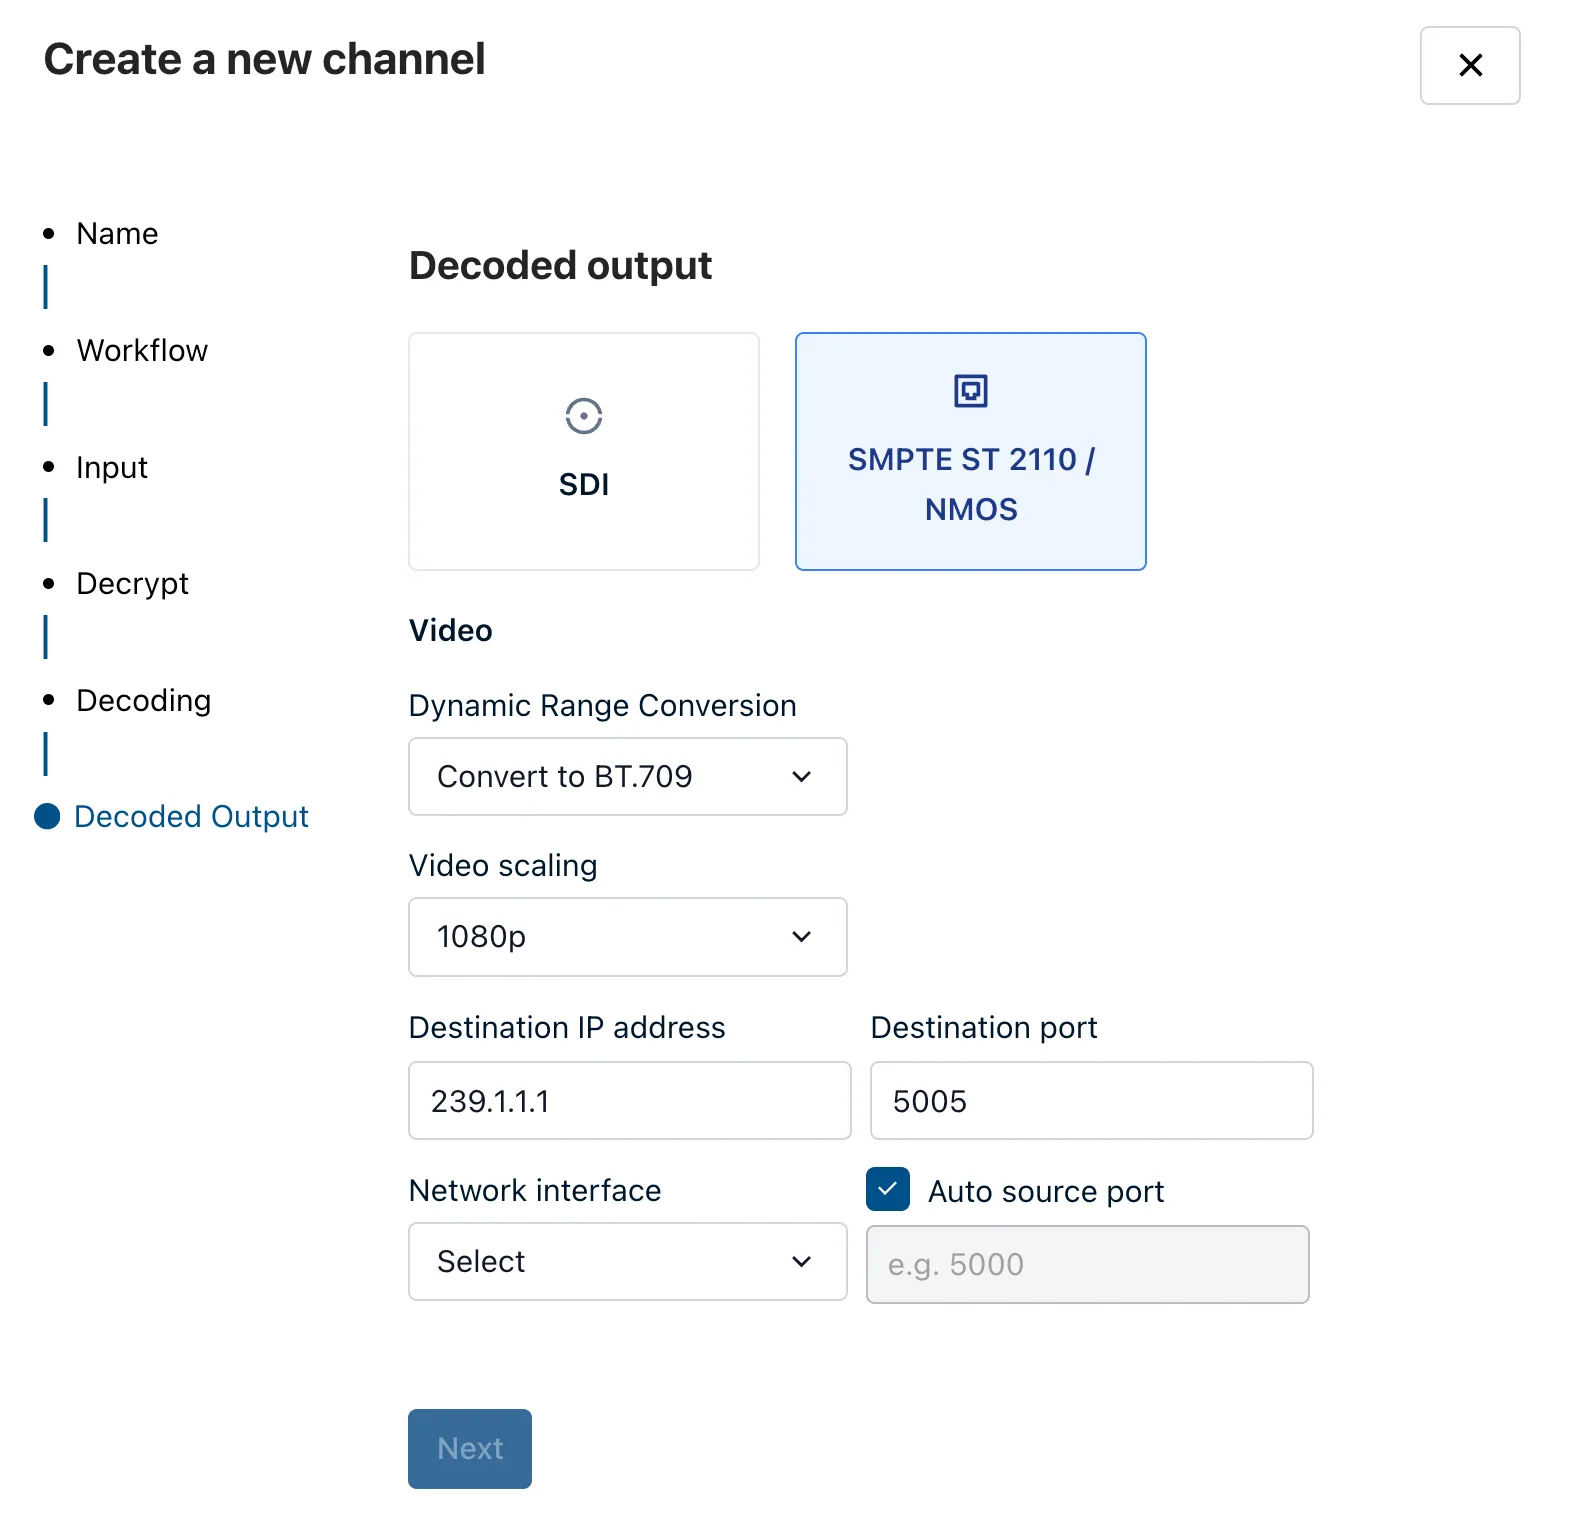
Select Next.
-
Review and create the channel
Review your channel settings lists each section with its own Modify button, so you can change one part without stepping back through the whole wizard. Back returns to the previous step. Select Create channel.
Verify the channel is working
Section titled “Verify the channel is working”The new channel opens in its detail view. Select Start to take it on air, then return to the dashboard.
On the dashboard, a healthy reception channel shows:
- Reception (Decoding) under the channel name, with the program it is decoding.
- An On Air badge and a live thumbnail.
- A signal diagram of the input and output types, for example SRTCaller into SDI, with green status dots at each end.
A channel that is not receiving shows Stopped or No thumbnail, and its Video parameters stay empty. See Beam Essentials UI for how to read the channel cards and the active alarms panel.
Related
Section titled “Related”- Create a channel covers the encoding workflows and the parts of the wizard shared by every channel type.
- Reception collects the reception guides for the Advanced interface, including the detail behind decryption and decoding.
- Channels API guides covers creating the same channel programmatically, where this workflow is
ReceptionDecoding.