Manage services
A service is a set of parameters required for a given processing type. Services can be manually started and stopped.
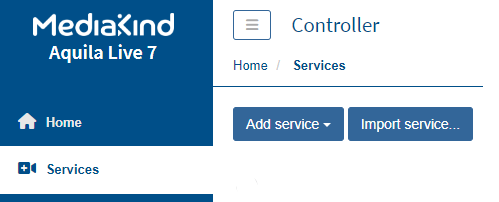
You can access services from the Home page dashboard or the left-side menu panel.

Service processing types
| Processing type | Required Software |
|---|---|
| Live Encoding | MediaKind Live Encoder |
| On-Demand Encoding | MediaKind On-Demand Encoder |
| Live Packaging | MediaKind Packager |
| On-Demand Packaging | MediaKind Packager |
| Catalog | MediaKind Packager |
| Multiplexing | MediaKind Multiplexer |
| Stream Personalization | MediaKind Prisma |
| Viewing Policy Manager | MediaKind Prisma |
| Manifest Conditioning | MediaKind Prisma |
| Stream Conditioning | MediaKind Prisma |
| Content Decisioning | MediaKind Prisma |
| TS Splicer | MediaKind Prisma |
| Reliable Transport | MediaKind Reliable Transport |
| Receiver | MK.IO Beam Distribution & Distribution |
Display services
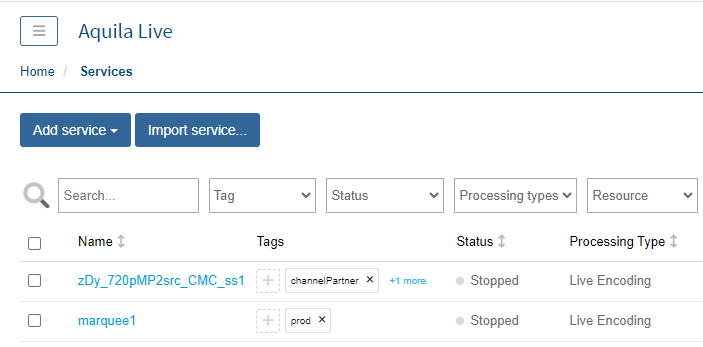
Services are listed in a table and are associated to a specific processing type. Service parameters and options depend on the processing type.
Before you start: ensure at least one service is configured.
To display services, follow these steps:
-
Click Services in the left-side menu panel. The table of services displays.

-
To easily find a service or refine the display, you can then:
- Use the search bar;
- Filter by specific fields (such as tag, status, processing types, resource, source, animation, alarm level);
- Show/hide columns by clicking at the right of the table headings;
- Sort the table using the up and down arrows next to each column heading.
Edit a service
To edit a service, just click the name. It takes you to the service editing page.
Create a service
Service configurations vary per processing type. See the specific component documentation for detailed information about service creation.
-
From the Services page, click Add Service.
-
Select a processing type. The service parameter options display.
-
You can configure the service parameters.
-
Once you have completed the service configuration, click Save and exit.
-
You can assign a server to the service. Multiple servers may be assigned to a same service.
-
You can use the buttons in the action column to start or stop the service.
Assign a server to run the service
Services require a server to run. Select a server for each service before starting the service.
For failover configurations:
- Failover only applies to certain processing types and configurations.
- Inactive backup servers (in a failover group) cannot be assigned to run a service.
- A primary server (in a failover group) that is in failover, meaning that a backup server has taken over and it is no longer running services, cannot be assigned to run services.
Typical use case, a service is assigned to one or more servers
-
From the Services page, click Add Server in the Resources column to display the available servers.
-
Tick one or more servers from the list then click Save. The selected servers are shown in the Resources column.
-
You can start the service.
In case of redundant outputs (Live Encoder)
-
From the Services page, go to the Resources column then click Add Server to display the available servers.
-
Select a server from the list then select either Set Primary or Set Secondary.
Related information
Create redundancy variants
In case of variants (Live Encoder)
-
From the Services page, go to the Resources column.
-
Only servers that match the server tags for subsets are offered.
-
Select a server from the list.
Related information
Create server variants
In case of variants and redundant outputs (Live Encoder)
-
From the Services page, go to the Resources column.
-
Only servers that match the server tags for subsets are offered.
-
Select a server from the list then select either Set Ptrimary or Set Secondary.
Related information
Create server variants
Create redundancy variants
In case of load balancing (On-demand Encoder)
You can assign additional servers to a service to help with load balancing. Encoding services are launched on the first server. When the first server in the pool of servers becomes saturated, the additional servers are used for encoding and job processing. When used with multiple servers, jobs are allocated on servers depending on their CPU usage.
-
From the Services page, go to the Resources column.
-
Select two or more servers from the list.
The service runs processes on the first server in the pool. Then, uses any additional resources in the pool job depending on their CPU usage.
Unassign a server from a service
-
From the Services page, go to the Resources column.
-
Select a server then click X next to the server name. The server is removed and is unassigned from the service.
Jobs that are running on an unassigned server are canceled and put back in the queue to be started again on another server.
Export a service configuration
Exported service configurations are for importing onto a different MediaKind system. This is useful for component or production support, or testing (parameters and expected function).
Exports exclude the service state (started or stopped). Importing service configurations may require manually starting or stopping other services.
From the Services page, click in the Actions column then click to export. A file will download in your browser's default location.
The download date in the file name is in the following format: YYYY/MM/DD.
Multiple services can be exported at once (See the Bulk Actions section). The services selected do not need to all be of the same type. Once you have selected your services click in the Actions column of any service then click to export. This will download a tar.gz file containing all the configurations of the selected services.
The download tar.gz file will always be called service_exports_YYYY-MM-DD.tar.gz.
Import a service
You can import a single service, or multiple services to a different server where the service is not currently configured. Import files must match expected formatting requirements.
The supported files are:
| File extension | Description |
|---|---|
| json | A single service configuration |
| tar | An archive containing several json files |
| tar.gz / tgz | A compressed archive containing several json files |
| zip | A zipped archive containing several json files |
Archives must only contain json files.
Before you start, ensure that the exported configuration files for the services are available. (See the Export a service configuration section)
Services on a same server require unique ids. Only import the service to a server where the service DOES NOT currently exist. If there is a conflict detected during import, you will be given the option to overwrite the existing service.
-
From the Services page, click the Import services... button.
-
Click Select files to browse for the .json or .tar.gz file previously exported for this service or services. You may select multiple files.
-
Click Import. The services are imported and appear in the list of services.
-
Click Close to close the import dialog.
If there are any errors during the import, you will be given the option to ignore, continue or ignore all.
If you select to ignore all errors, the import process will continue to completion without stopping on future errors.
Importing a lot of files can take several minutes to complete. During the import process DO NOT navigate away from the import page.
Start a service
Services can be started and stopped manually from the Services page.
Before you start: At least one service has been created and is available in the list of services, and at least one server is assigned to run the service.
From the Services page, click in the Actions column to launch the service. The Status changes to started.
If an alarm is raised, click to display all alarms. Alarm colors are based on severity.
Stop a service
Stop a service manually for support, testing or for general system administration purposes. Once stopped, the assigned server no longer executes the service.
Stopping a service cancels any jobs in progress.
-
From the Services page, click in the Actions column to stop the service. You are prompted to confirm.
-
Click Yes, Stop it!. The service status changes to stopped. The service stops running.
With On-Demand encoder, jobs that are running on an unassigned server are canceled and put back in the queue to be started again on another server.
Copy a service
From the Services page, click in the Actions column then select to copy the service. A "-copy" suffix is added to the name of the duplicated service.
You can simultaneously select and copy several services at once (see Bulk actions).
Delete a service
Deleting a service removes a service from the list of available services.
For detailed information regarding a Live Packaging service deletion, see Deleting a Live Packaging service and managing DVR.
-
From the Services page, click in the Actions column then select to delete the service.
-
Click Yes, delete it! to confirm. The service is removed from the services table and is no longer available.
Failover or revert a service
If a service is running on a server that is in a service-level failover group, a manual failover/revert can be triggered. For information on this, please refer to the Request a failover or a revert between servers manually section.
Bulk actions
Some operations support bulk actions. You can select multiple services by ticking the corresponding boxes, or you can select all services on the page by ticking the box next to the Name column. Then, you can apply bulk operations such as start, stop, copy, and delete. Stopping or deleting multiple services will prompt a warning message.
You can use the search bar, filter by specific fields, or sort the table using the up and down arrows to refine the services displayed before performing a bulk action..
Configure advanced parameters for an existing service
-
From the Services page, click the service name to edit the service then click the Advanced parameters tab.
-
Click Add then enter the parameter name and value. You can add multiple advanced parameters to the service.
-
Click Save and continue before continuing in order to avoid losing the configuration.