BISS-CA Decryption
Trusted Platform Module (TPM) must be fitted. If not fitted, the BISS-CA functionality will be hidden. Please contact MediaKind Customer Support on how to check this.
BISS v2 mode CA, or BISS-CA (as specified in EBU Tech 3292-s1 Version 1.0 March 2018) is an extension to BISS v2 which replaces the fixed Session Word (SW) used to descramble an incoming feed with a cycling Session Word that is transmitted in the transport stream using Entitlement Control Messages (ECMs).
Receivers may be entitled by the headend to decrypt the cycling Session Words via an intermediary Session Key (SK) which are transmitted in the transport stream using Entitlement Management Message (EMMs).
Entitlement of the receiver is handled through public/private key cryptography where the public and private keys are both known to the receiver and only the public key is known to the headend. For each entitled receiver, the SK is encrypted using the receiver’s public key.
The receiver component supports the following BISS-CA features:
- Self-generated key pair
- Injected key pair
Key pairs
Multiple Self-Generated Key Pairs and/or Injected Key Pairs can be stored on a single unit. This allows the receiver operator to switch the unit between headend scramblers without having to reload or regenerate the key pairs.
For all key pair types, the receiver permits the public key to be downloaded so that it can be communicated to the headend operator to allow the unit to be entitled.
BISS-CA key pairs
There are two types of key pairs supported by the receiver component as described below.
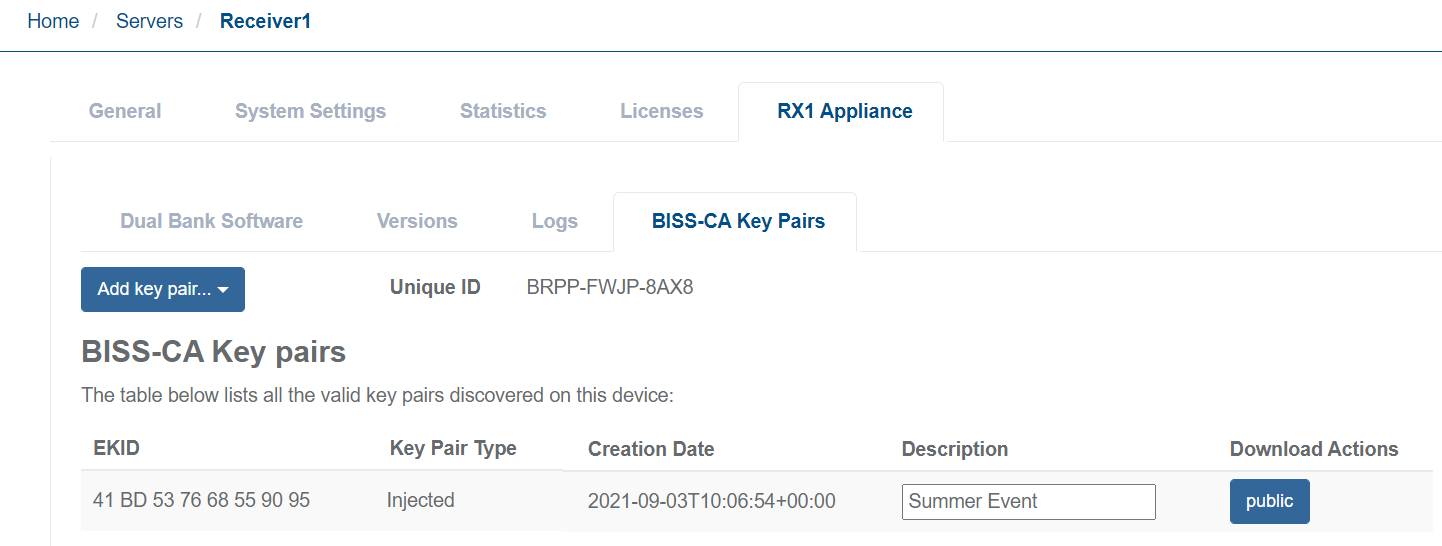
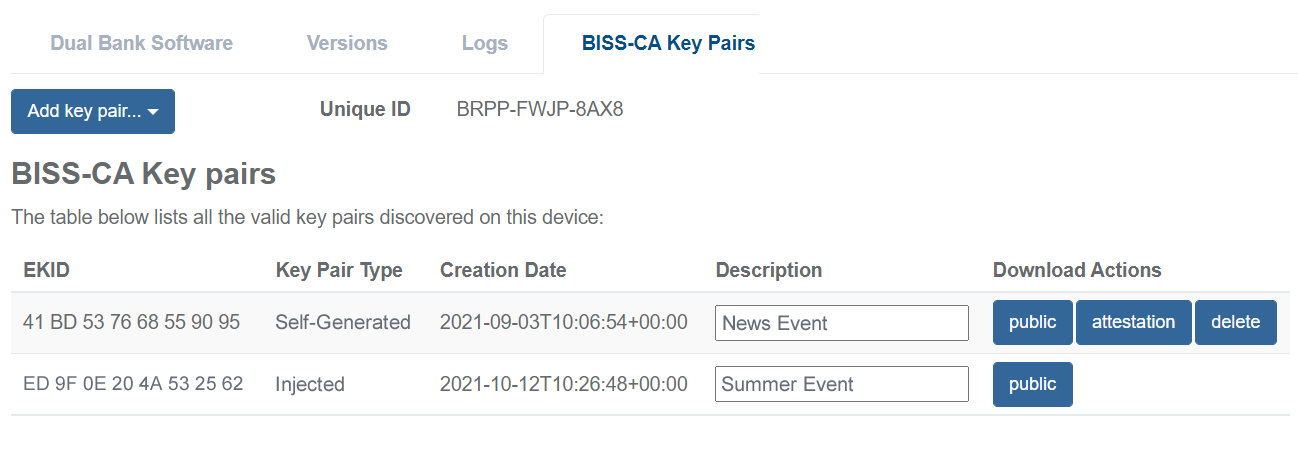
The key pairs that are currently stored on the unit running the receiver can be viewed from the BISS-CA key pairs table under Server Information (see Display BISS-CA key pairs table).
The BISS-CA key pairs table will list the following information:
-
EKID: This is the Entitlement Key ID derived from the key pair stored on the unit. It will be unique to the key pair and may be used to reference or identify the key pair when communicating with the content provider about what keys are present.
-
Key Pair Type: This indicates the Key Pair Type as either Self-Generated or Injected.
-
Creation Date: The date when the key pair was generated or imported on to the unit.
-
Description: A text field that the operator can optionally fill to help identify what the key pair is used for such as, name of content provider, event name, etc. This field has no effect on the operation of BISS-CA decryption.
-
Download Actions: The Download Actions available for the key pair which vary according to the key pair Type:
- Public: Download the public portion of the key pair; All key pair types.
- Attestation: Download attestation data for the key pair; Self-Generated key pairs only.
- Delete: Remove the key pair from storage on the unit; Self-Generated and Injected key pairs only.
Display BISS-CA key pairs table
To navigate to the key pairs table, follow these steps:
-
Display Servers.
-
Click the Detail icon, to display Server information.
-
Click the Appliance tab then click the BISS-CA Key Pairs tab. Valid key pairs are displayed in a table.
Create a self-generated key pair
To create a self-generated key pair, follow these steps:
-
Click Add key Pair.
-
Select Self-Generated Key Pair. A pop-up window should appear stating Success.
-
Click OK to close the pop-up window. A new Key Pair entry should appear in the BISS-CA Key Pair table.
-
Enter a suitable descriptive title in the Description field to help identify what content provider this Key Pair will be registered to or the name of the event it will be used for.
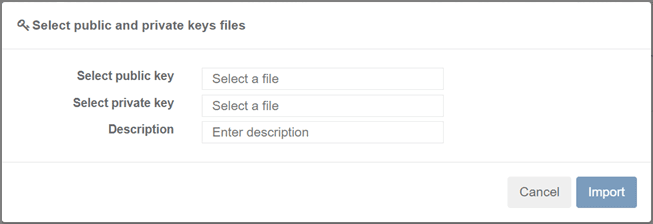
Import injected key pair
To import an injected key pair, follow these steps:
-
Click Add Key Pair.
-
Select Import Injected Key Pair. A pop-up browser window should appear showing the required fields necessary for importing an Injected key pair.
-
Click Select a File for the Select Public Key field, browse and select the file for the public portion of the key pair.
-
Click Select a File for the Select Private Key field, browse and select the file for the private portion of the key pair.
-
Enter a suitable descriptive title in the Description field to help identify what content provider this key pair will be registered to or the name of the event it will be used for.
-
Click the Import button. A pop-up window should appear stating Success.
-
Click OK to close the pop-up window. A new key pair entry should appear in the BISS-CA key pair table.
Export the public key
Exporting the public portion of a key pair stored on the unit is available for Self-Generated and Injected key pair types.
To export the public key, follow these steps:
-
Locate the row with the desired key pair.
-
From the Download Actions column, click the Public button.
Export attestation data
To authenticate that a Self-Generated key pair was created by the receiver, an Attestation Package can be exported for validation.
- The receiver does not provide attestation data in the form of a X.509 certificate.
- There is no attestation data available for Buried or Injected Key Pairs.
To export attestation data, follow these steps:
-
Locate the row with the desired key pair.
-
From the Download Actions column click the Attestation button.
Remove stored key Pair
Only Self-Generated and Injected key pair types can be removed from the unit.
Once a key pair has been removed, it is impossible to undo or recover the lost key pair. A service that is dependent on the key pair removed can no longer be descrambled. New entitlements will need to be obtained from the content provider (see Managing BISS-CA entitlements).
To remove a stored key pair, follow these steps:
-
Locate the row with the desired key pair.
-
From the Download Actions column click the Delete button. A pop-up window should appear confirming the action.
-
Select Yes, Delete Key to complete the action. A pop-up window should appear stating Success.
-
Click OK to close the pop-up window.
Enable BISS-CA decryption for service decode
See Managing BISS-CA Entitlements.
For a service that has been configured for UHD or SD/HD, enable BISS-CA with the following steps:
-
From the Home page, select the RECEIVER item from the required feed then click to edit
-
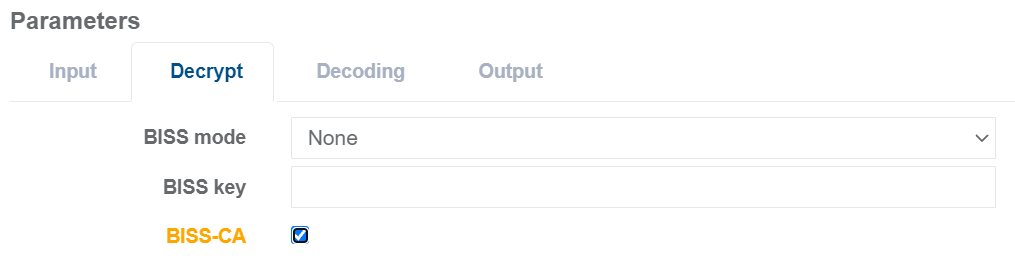
From the Parameters window, select the Decrypt tab.
-
Tick the BISS-CA checkbox to enable decryption (untick the checkbox to disable decryption).
-
Click Save and continue to save your changes.
Enable BISS-CA decryption for TS passthrough
See Managing BISS-CA Entitlements.
For a service that has been configured for TS Passthrough, enable BISS-CA with the following steps:
-
From the Home page, select the RECEIVER item from the required feed then click to edit
-
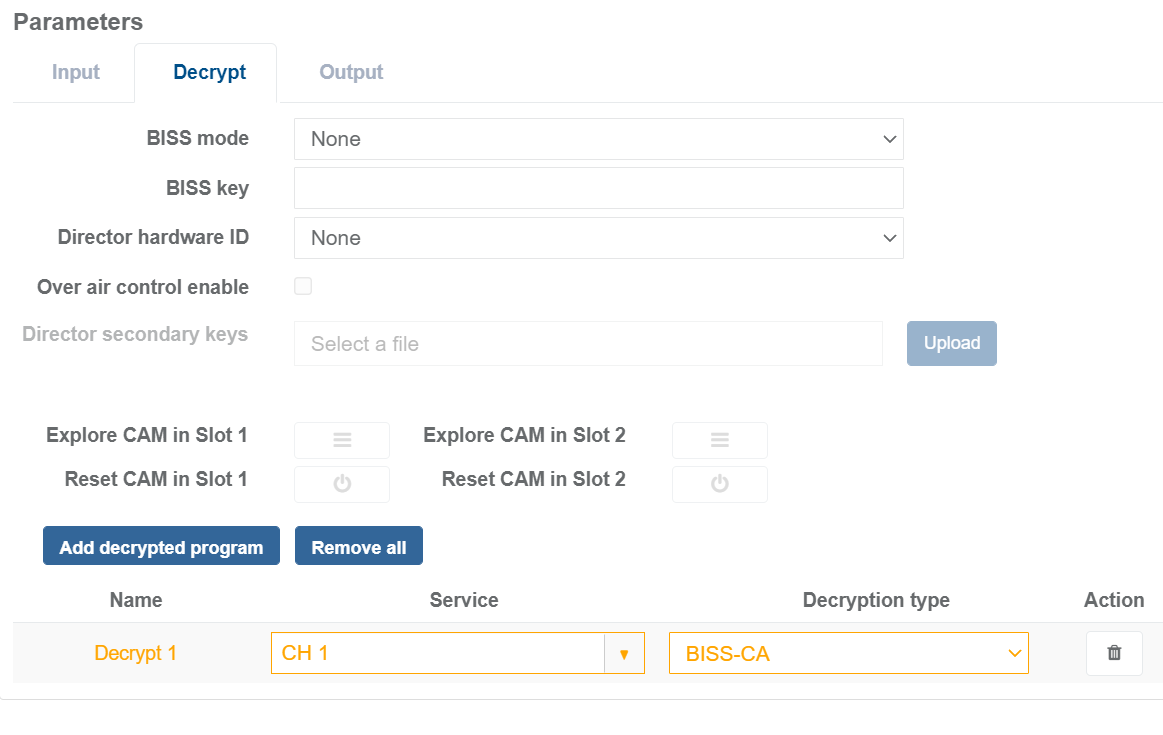
From the Parameters window, select the Decrypt tab.
-
Click Add Decrypted Program button. A new row will appear in the decryption table.
-
Set the Service to be decrypted and set the Decryption Type to BISS-CA.
-
Click Save and continue to save your changes.