Input source redundancy modes
If a source has bad health, Multiplexer can automatically switch to an alternative source. Conversely, if the secondary has bad health, it can prevent from an unnecessary redundancy switch. Monitoring the secondary provides the advantage of having a health report for all sources, allowing the automatic switch to use this information when necessary. However, this behavior has the drawback of higher CPU and network bandwidth usage.
The behavior of the input source switch mechanism can be summarized into two modes:
- Automatic switch behavior when the secondary sources are monitored:
- If the active source input shows bad health, then a switch to another source reporting source with good health (green) occurs.
- If the active source reports PID or PIDs missing and they are reported as critical, then a switch to another source reporting source with good health (green) occurs.
- If the active source has missing PID or PIDs reported but only as warning, then no change occurs.
- Automatic switch behavior when the secondary sources are not monitored:
- If the active source input goes missing, then a switch to another source occurs.
- If the active source has missing PID or PIDs reported and they are reported as critical then a switch to another source occurs.
- If the active source has missing PID or PIDs reported but only as warnings, then no change occurs.
If all sources have bad health, the Multiplexer continues cycling through the sources until a source with good health (green) is available.
Input source health monitoring view
The Input Redundancy Health view displays information on the health of an input source for all servers the configuration is assigned to. This page is an overview of redundant input sources, the input source health, the DVB services per source and you can manually switch between sources.
Both the input name assigned by the user in the Multiplexer configuration and the input details are visible for added convenience. If the input is used for multiple output services and/or components, the full list under Output Services can be expanded by clicking it.

Displaying health information for an input source
The Input Redundancy health page can be used to monitor input sources and manually switch sources.
-
Edit the Multiplexing service from the Services page. Alternatively, go to the services Statistics view.
-
Select Input redundancy to display the input sources, and their redundancies and statuses.

-
Hover the mouse over the status for a source to display information.

Switching the active input source manually
A transport stream is running with primary and secondary inputs.
-
Display Services.
-
Edit the Multiplexing service to display the transport stream.
-
Select Input Redundancy to display the health page.
-
Click to switch to the other input source.
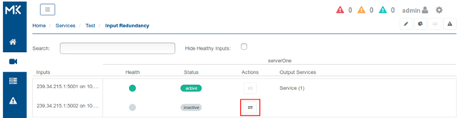
The previously inactive source becomes active.
Automatic input source switch health monitoring
You can monitor the health for individual input components (PIDs) or input DVB services. You can configure a missing component or DVB service to contribute to the health of an input source and trigger a redundancy switch if necessary.
Monitoring input source health at the service level
-
Display Services.
-
Edit the Multiplexing service to display the transport stream.
-
Select the Transport Stream to display the Properties configuration.
-
Configure the Source Redundancy Mode parameter to Automatic with monitoring.

-
From the Output Stream tree, select the Service to display Output parameters.
-
Select Monitor health of all signalled Input components to activate the automatic health monitoring for this service.
-
Check the health of the input sources for this service:
-
Stop the primary source supplying the Multiplexer.
-
Click in the header menu to display the Input source health monitoring page.
-
Hover the mouse over the input source statuses to get more details.
As a result, the input source is showing an unhealthy status. The missing PIDs from the service are now reported as critical issues and they are labelled Missing Mandatory Component. If the secondary source is healthy, the input source automatic switches to the healthy input.
-
Monitoring input source health at the component level
-
Display Services.
-
Edit the Multiplexing service to display the transport stream.
-
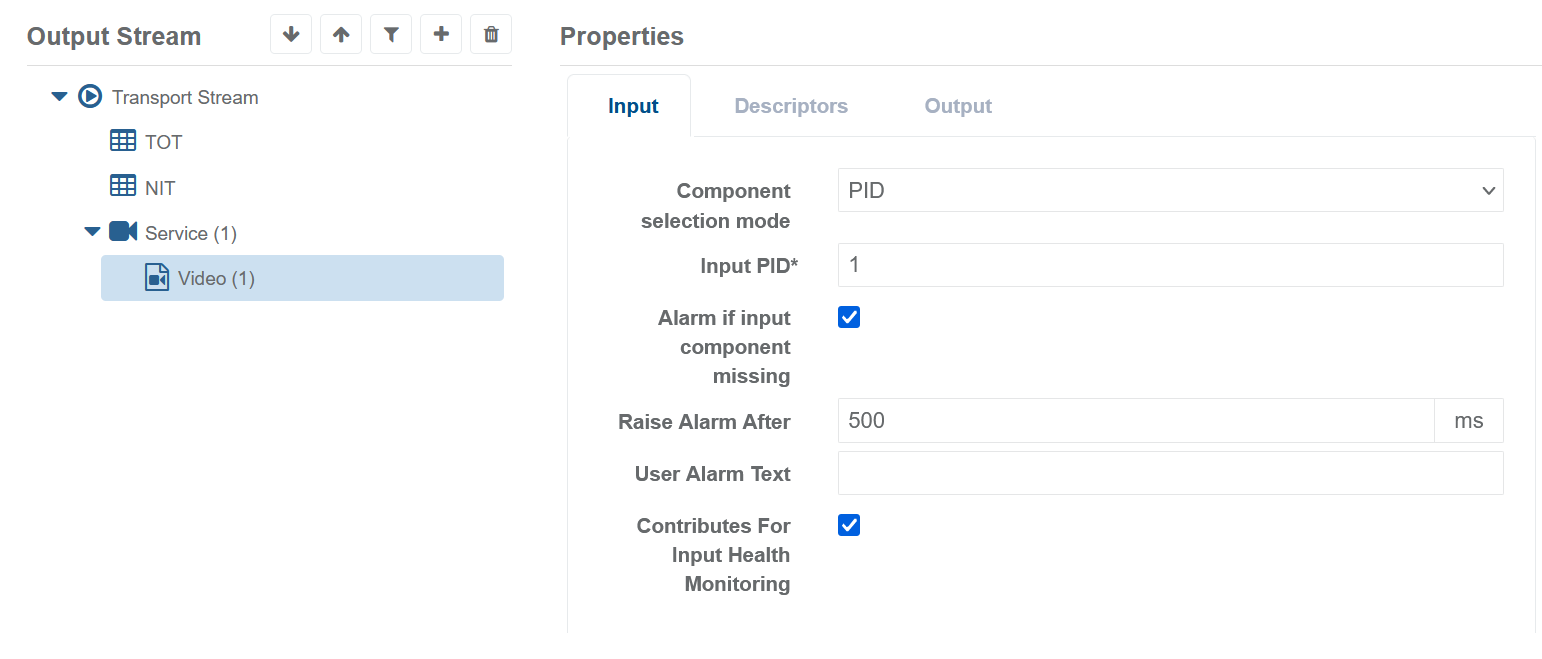
Select the Output component in the Transport Stream tree to display the Properties configuration.
-
From the Input tab, select Alarm if input component missing to enable.
-
From the Input tab, select Contributes for input health Monitoring.
-
Check that the automatic switch occurs when necessary:
-
Stop the primary source for the PID.
-
Click in the header menu to display the Input source health monitoring page.
-
Hover the mouse over the input source statuses to get more details. The active input source switches to the healthy input source.
-
Using the Input Content panel
To preview the inputs to the Multiplexer configuration being created, use the Input Content panel.
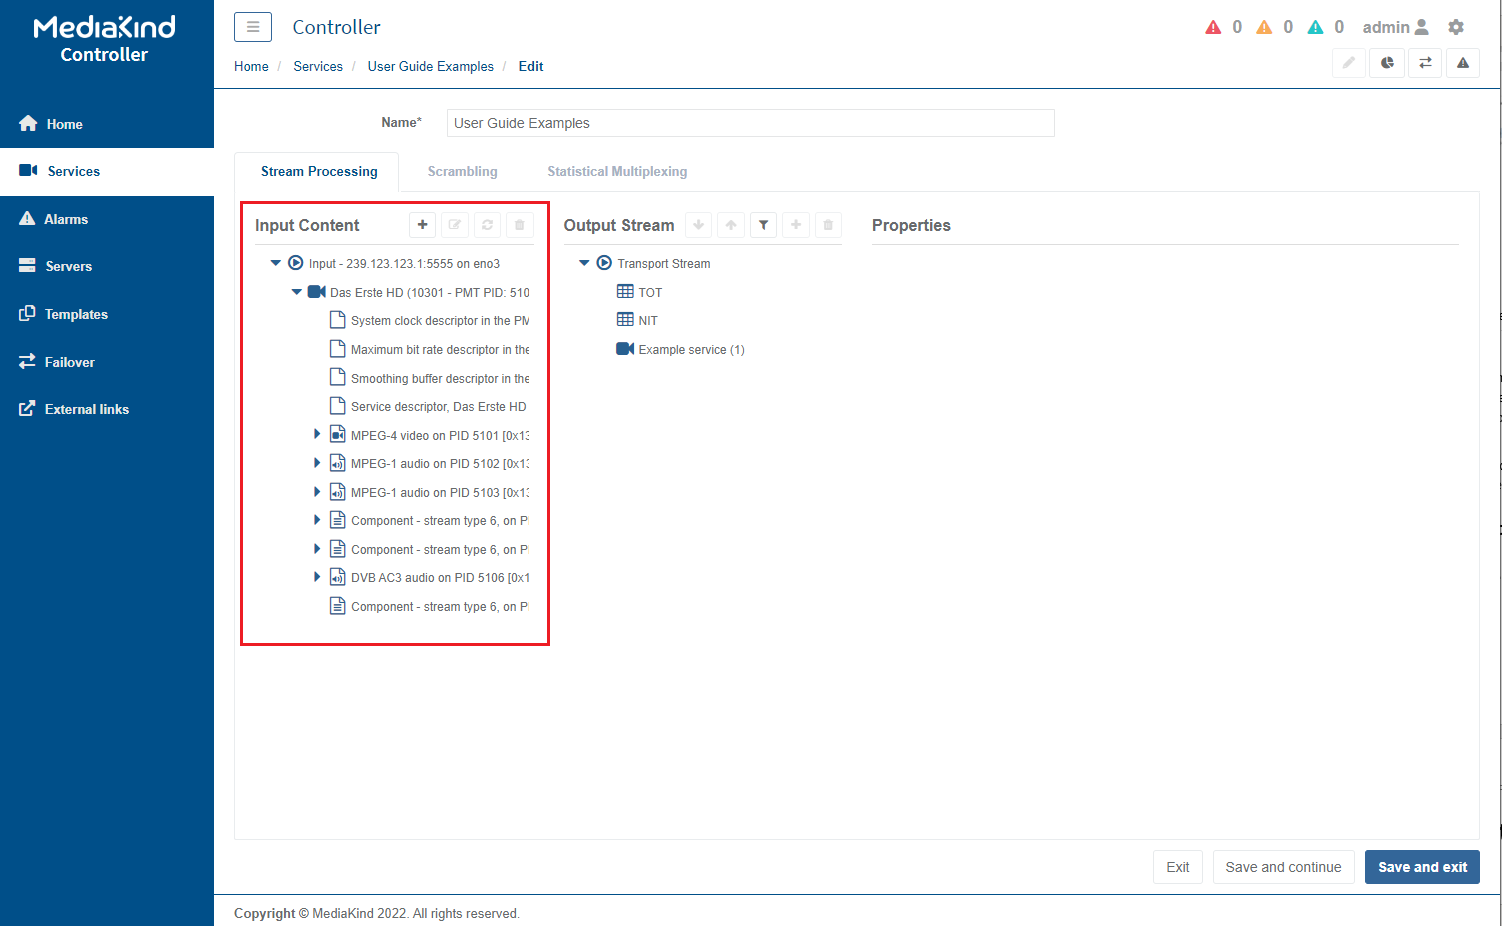
The Input Content panel is pre-loaded with any input in use by a configuration output services.
Adding a new input to the Input Content panel on a new configuration or an existing configuration
-
Click the plus (+) button next to the panel title banner.

-
Fill the fields.
The field validation similar to the output panel applies in this window. Invalid fields are highlighted in red and an error message shows.

-
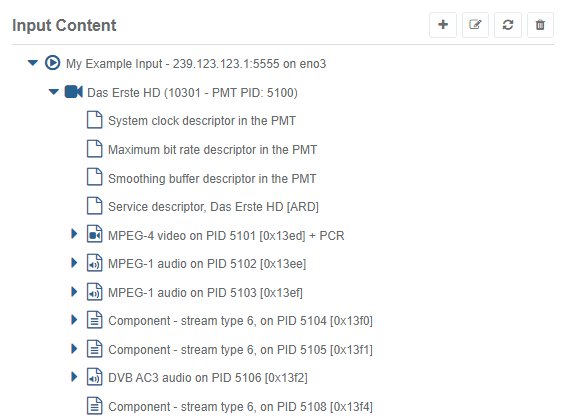
Once all the required fields are filled and valid, click Add. The newly created input shows, collapsed, in the Input Content panel.The new input enters the Loading state until it has extracted all the information or up to a maximum of 30 seconds.

-
To expand the input, click the arrow to the left of the input entry. You can also expand the child service or the component entries to reveal all the information extracted.
-
To use the input as a source, go to the Properties panel and click the List of the existing sources drop-down box.
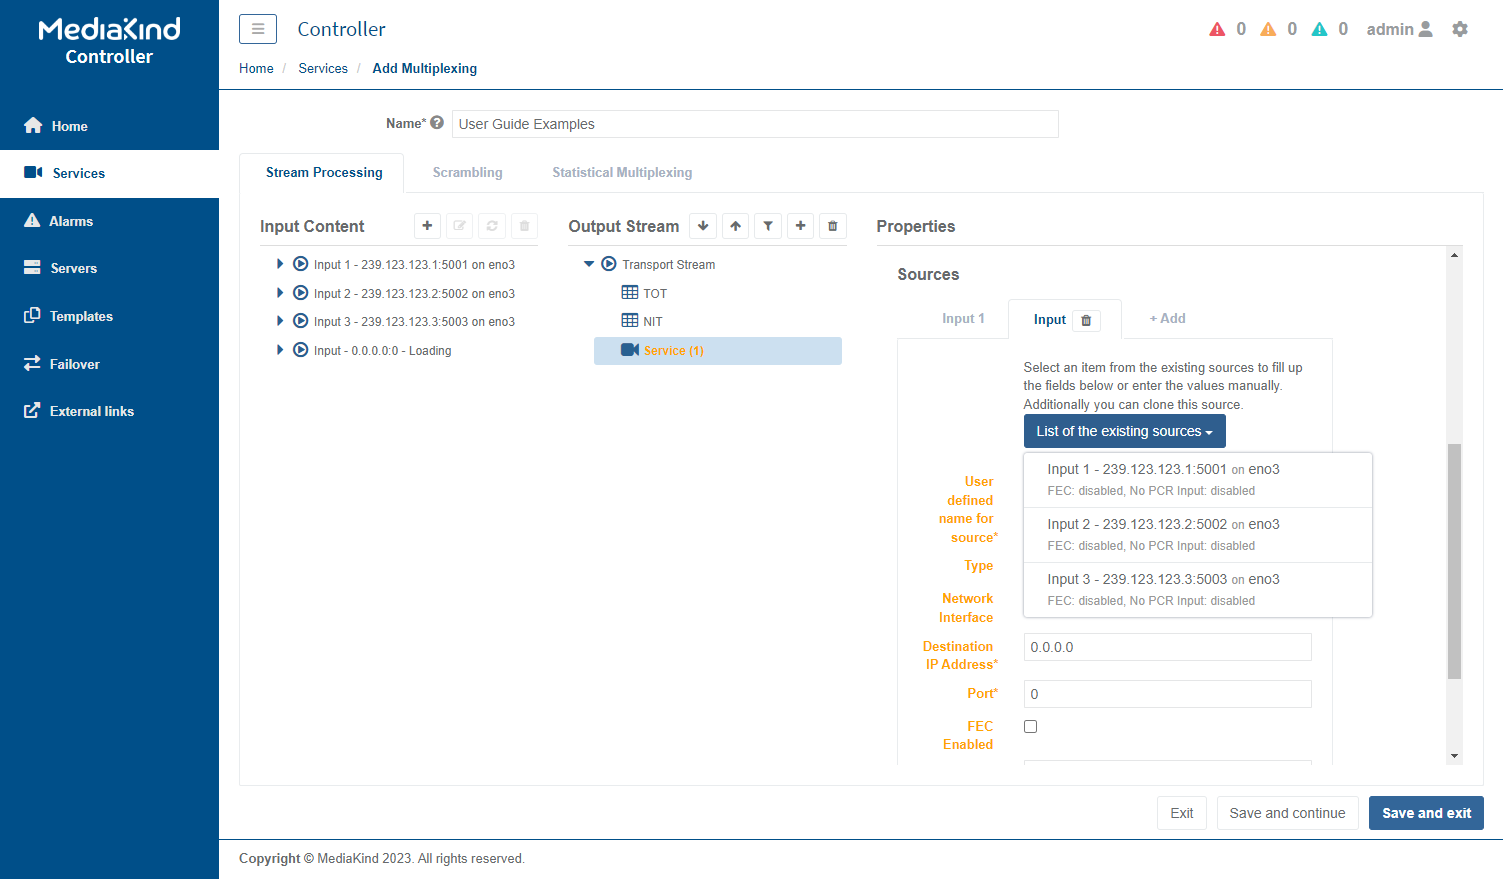
-
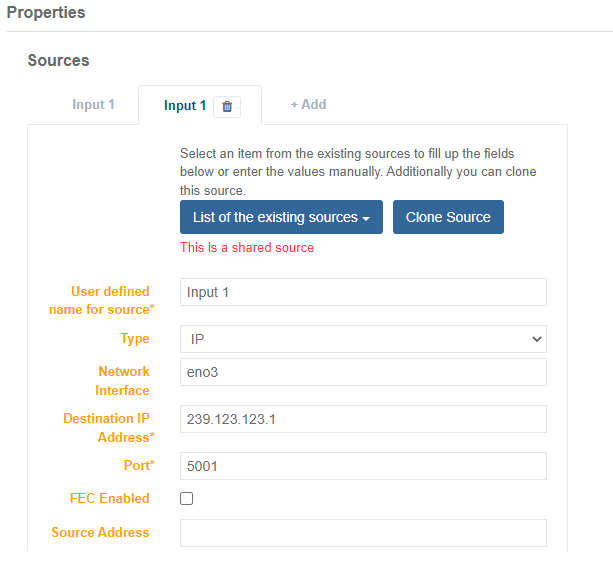
Click the input. The input panel fields fill automatically. If there are multiple inputs that use this input as a source, it will also be set as a shared source.
Drag & Drop
This is only supported from Multiplexer versions 21.3 onwards.
Alternatively, it is possible to create output items by dragging items from the Input Content Panel to the Output Stream Panel. This heavily reduces the burden of manual data introduction and checking.
When using the Drag & Drop functionality, a copy of the item that was dragged will be created in snapshot mode. This is ideal for remux head end scenarios, where multiple MPTS sources that are outside of the user’s control need to be manipulated. This process normally involves breaking the incoming MPTS sources apart and recombining the services into new output MPTS containing different sets of services. Since the user may not have control over the incoming transport streams, their only source of control of the output is in the mux configuration itself. In these types of systems, we would expect the user to explicitly configure the services and components being passed through along with PSI/SI manipulations required to make it "their" output. Because of this, when considering a UX based on dragging input items to the output we believe operations should work recursively on whole branches to produce a static output i.e. one that does not change because items have been added to the input. We are calling this the "snapshot approach" when discussing the drag and drop operations as it produces a fixed configuration based on the "snapshot" of the input when the user was editing the configuration.
Once the content finishes loading in the Input Content Panel, click, hold, and drag the desired item to the desired target parent in the Output Stream panel. If it is dragged to a valid target, the target itself will be highlighted in green (see picture below) and the input item can be dropped. If the target is highlighted in red, it is not a valid operation and no action will take place.

Once the item is dropped to a valid target parent, a copy of it will be added to the output stream. Available configuration fields will be autofilled from the content extracted and displayed in the Input Content Panel. Any children items will be recursively added in the same way.
Do any edits to the autofilled new items under the Output Stream panel. Save the configuration.

The following drag and drop operations are currently implemented:
| Drag (Source) | Drop to (Target) | Mode |
|---|---|---|
| Service | Transport Stream / Service | Snapshot |
| Component | Transport Stream / Service / Component | Snapshot |
| Descriptor | Component / Descriptor | Snapshot |
Managing inputs in the Input Content panel
You can manipulate the inputs added to the Input Content panel manually or retrieved from the configuration:
- by using the buttons next to the Input Content panel title;
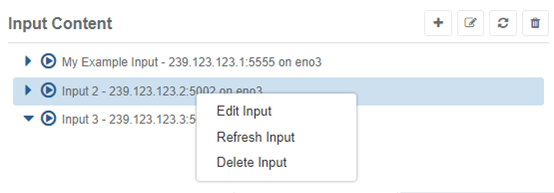
- by right-clicking on each input to reveal the context menu.
The buttons and options in the context menu are greyed out for any entry that is not a top-level input.
You can bring back the input details window:
- by selecting Edit Input;
- by clicking the pencil button.
You can change any of the original input details. Once saved, the changes automatically apply to any output source that uses this input.
If you select Refresh Input or click the cycle arrows button, the selected input enters the Loading stage again and extracts up-to-date information on the input.
Once loaded, the input-extracted information does not refresh automatically.
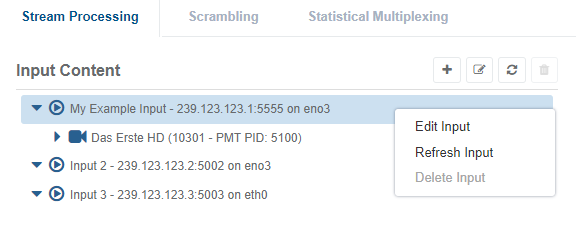
You can delete inputs:
- by selecting Delete Input;
- by clicking the trash can button.
The inputs that are in use cannot be deleted. If the input is in use, the Delete Input option and the trash can button are greyed out.
The inputs in the Input Content panel that are not in use are not saved when you exit or refresh the configuration page.