Create and configure an On-Demand Encoder OTT service
Below is an example procedure that shows you how to create an OTT service by generating multi-audio and video profiles as well as a manifest file, facilitating downstream packaging.
The default service is functional but usually requires edition to match encoding needs.
Objective: Create an OTT service with 5 video profiles from UHD to sub-SD resolutions and associate two audio stereo channels to support multi-languages for post processing operations by MediaKind Packager.
Video profiles
| Target bitrate (kbps) | Frame rate (fps) | Resolution | Codec | Expected Quality |
|---|---|---|---|---|
| 20000 | 60 | 3840x2160 | HEVC 10 bit | Best |
| 8600 | 60 | 1920x1080 | HEVC 10 bit | Best |
| 4000 | 60 | 1080x720 | HEVC 10 bit | Good |
| 2200 | 30 | 960x540 | HEVC 10 bit | Satisfactory |
| 500 | 15 | 480x270 | HEVC 10 bit | Satisfactory |
Audio Profiles
| Target bitrate (kbps) | Sampling rate (kHz) | Codec |
|---|---|---|
| 48 | 44.1 | HE-AAC |
| 48 | 44.1 | HE-AAC |
The following steps are an example of possible customized configurations.
-
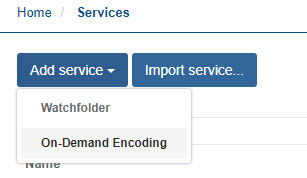
Create a new On-Demand Encoding service: Services > Add service > On-Demand Encoding.
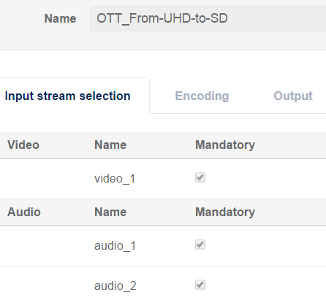
By default, the service has one audio and one video stream.
-
Enter a name for the service.
-
Add an audio stream to the Input Stream Selection.
-
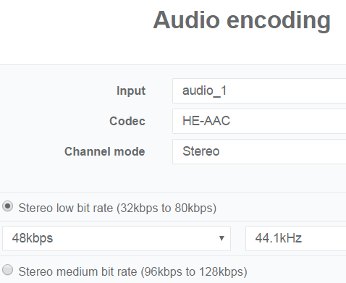
Click Add audio... to add one audio stream. The Audio media processing options display.
-
Configure the audio processing parameters, then click Apply. One video stream and two audio streams display in the Input Stream Selection.
-
-
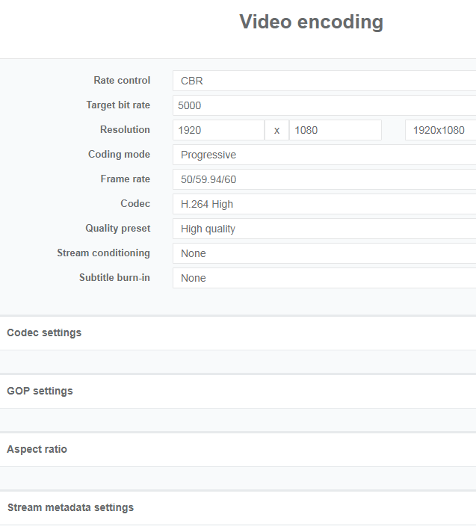
Configure the video stream Encoding settings.
Use the video profiles table at the beginning of this example to guide your configuration.
-
Open the Encoding tab to display streams.
-
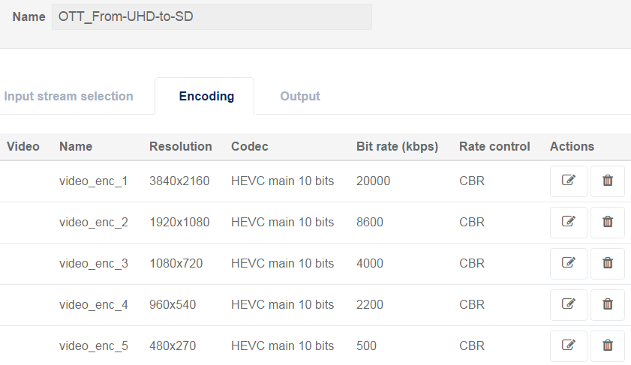
Click Add video... to add the 4 additional video streams required for this example objective.
-
Click to open the Video encoding options.
-
Configure the Video encoding settings for each stream, then click Apply.
-
Configure the remaining streams. The 5 video streams are configured according to this example objective.
-
-
Configure the Audio stream Encoding settings.
Use the audio profile table at the beginning of this example to guide your configuration.
-
From the Encoding tab, click Add audio... The Audio encoding options display.
-
Configure the Audio encoding options, then click Apply.
-
Add and configure the second audio encoding parameters. The additional audio streams appear in the Input stream Audio selection.
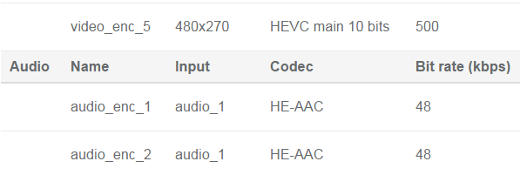
The Video and Audio streams match our example objectives:
- 5 video streams configured with the provided video profiles.
- 2 audio streams configured with the provided audio profiles.
-
-
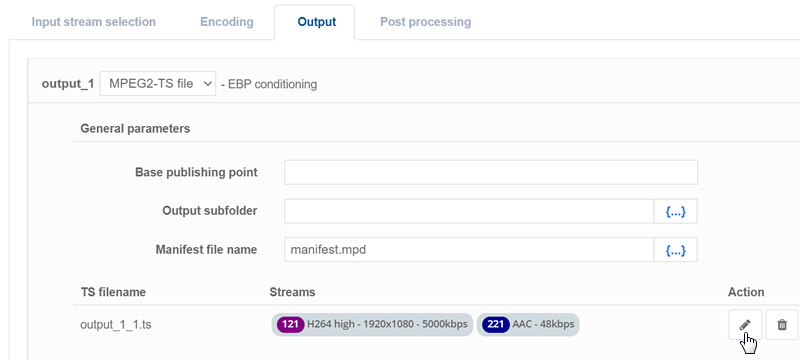
Configure output to generate a manifest with one TS file per video layers.
-
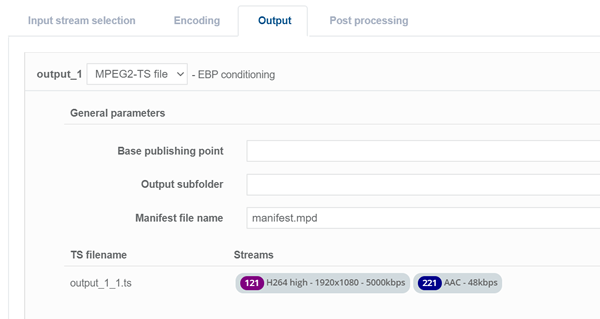
Open the Output tab to configure the stream output settings.
-
Enter the base publishing point.
-
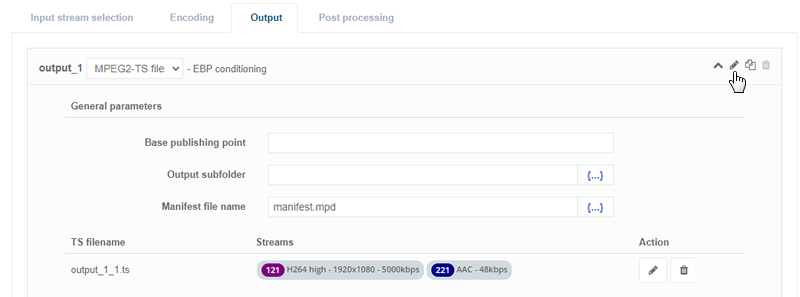
Click for output_x to edit the output parameters.
-
-
Edit the TS file settings of the outputs
-
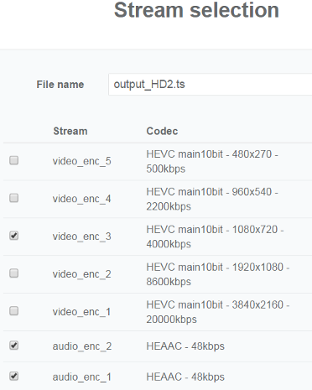
Click for output_x_x.ts to edit stream configurations.
The Stream selection options display.
-
Select one video with the audio streams.
-
Configure the PID settings.

The PID is only configurable for selected streams. Otherwise, the PID setting is inactive and grayed.
- Click Apply.
-
-
Click Add TS file for each of the video layer and configure it accordingly.
-
Click Save and exit to save service configurations and return to the list of services. The service displays in the list of services.
-
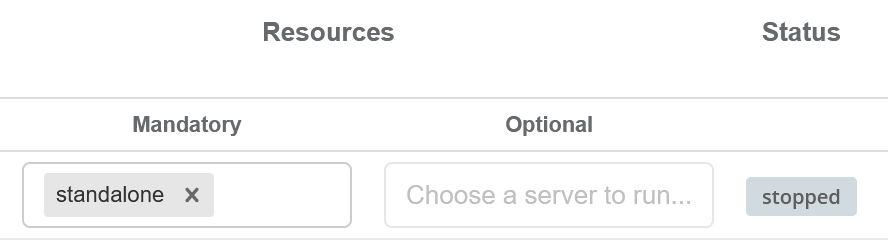
Assign the service to a server.
-
Click to start the service.
-
To add a job, click the service name from the list of services to display the Jobs page.
- The page that displays when you click on a service may vary depending on the processing type.
- Services display as links if there is specific service information do display.
The Job is automatically launched when added. The .ts files are generated in the defined output folder. Jobs set with the same priority are launched in order, per job creation date.