Configure the decoding
Configure video decoding
Before you start, ensure:
- inputs are configured.
- at least one Receiver service is configured.
-
From the Home page, select the RECEIVER item from the required feed then click .
-
From the Parameters section, select the Decoding tab.
-
Select a service from the Service drop-down list to decode. The first video and audio as listed in the service PMT are automatically decoded.
-
Check Service Status.
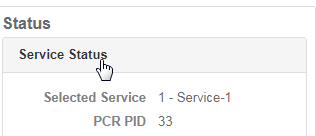
The first video and audio as listed in the service PMT are automatically decoded. The service name and associated PCR PID are displayed in the Service status window.
-
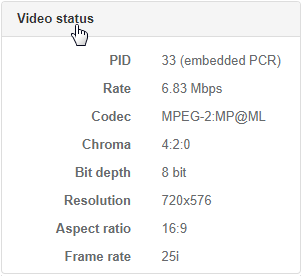
Check the Video Status. The video PID, component bit rate, codec being used, resolution, picture aspect ratio and frame rate are displayed in the Video Status window.
-
Check the Input Monitor. A thumbnail of the decoded video is displayed in the Input Monitor window. The thumbnail is updated every 5 seconds.
-
Check the Audio Status. The audio PID, status and codec are displayed in the Audio Status window.
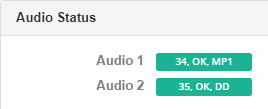
Hover your cursor over the audio status to display the channel mode, language and component bit rate.
Audio decoding
Audio formats and decoding standards
| Codec | Sample Rate | Bit Depth | Output format |
|---|---|---|---|
| MPEG1-LII | 48kHz | n/a | Decode |
| Dolby Digital | 48kHz | n/a | Decode |
| Dolby Digital + | 48kHz | n/a | Decode |
| MPEG-H | 48kHz | 24 | Contribution Decode |
| MPEG-H | 48kHz | 16 | Pass-through |
| LPCM | 48kHz | 16/20/24 | Pass-through |
| Dolby-E | 48kHz | 16/20/24 | Pass-through |
| Dolby Digital | 48kHz | 16 | Pass-through |
| Dolby Digital+ | 48kHz | 16 | Pass-through |
Configure audio decoding
Before you start, ensure:
- At least one Receiver service is configured.
- Video decoding is configured.
- A maximum of 8 audio components (stereo pairs) can be decoded simultaneously for each Receiver service.
- Decoding MPEG-H audio requires using all 8 audio output components.
-
From the Home page, select the RECEIVER item from the required feed then click .
-
From the Parameters section, select the Decoding tab.
-
Select Audio to display audio decode settings. The first decoded audio is automatically given the reference name Audio 1. This reference is used when configuring the audio outputs.
-
Select an audio Input from the drop-down menu. The PID and language of the audio being decoded are shown in the Input column once the configuration is saved.
-
Enter a PID value to be decoded.
- You can choose to manually enter a PID.
- If the selected PID is present in the PMT then the receiver attempts to decode any available audio on the PID.
-
Add an audio to decode.
-
Select a Decode channel configuration for each audio from the following options:
| Option | |
|---|---|
| Stereo | Decode stereo, dual mono, mono, joint stereo. Decode any audio using up to 2 channels. |
| 5.1 | Decode 5.1 channels. |
| 16 | Use this for MPEG-H (see note below) |
| Pass-Through | No decode. Use this option for compressed audio output. |
- If the audio being decoded is an MPEG-H audio component then the decode channel configuration must be set to 16. Otherwise all audio channels associated with the audio component are output as silence.
- Setting the decode channel configuration also sets the number of embedded channels required for the SDI output. You can see the incoming audio stereo or 5.1 layout from the Audio Status window.
- 1 embedded channel for a Stereo pair.
- 3 embedded channels for a 5.1 service.
- If the audio being decoded is a 5.1 service and Stereo is selected, then the audio will be down mixed to a Stereo pair.
Audio auto select decoding
Auto decode applies to audio components for a selected service. The audio components are automatically decoded and embedded into the output SDI that are configured as stereo channels. Components are decoded and embedded in the output in the order that they appear in the PMT.
Audio auto select can be applied for a maximum of 16 audio components per service.
Components are decoded and embedded in the output in the order that they appear in the PMT.
Audio auto select should not be configured when using SMPTE ST-2110 outputs, this may produce either too many or too few audio channels in the ST-2110 audio stream output.
New audio components
- New audio components appearing in the incoming service are decoded and embedded in the output in the order that they appear in the PMT.
- If a new component is presented in the PMT before any existing components then all existing components after the new component in the PMT are embedded into a different audio channel on the SDI output.
- If the number of channels exceeds 16, then the last existing component in the PMT is no longer be decoded and removed from the output SDI.
Removed audio components
- Any audio component that is removed from the incoming service will be deleted from the SDI output.
- Any audio components presented after a removed component in the PMT are embedded into a different audio channel on the SDI output.
Set "Auto Select" mode for audio decoding
-
From the Home page, select the RECEIVER item from the required feed then click .
-
Select the Decoding tab in the Parameters window.
-
Select the Audio tab.
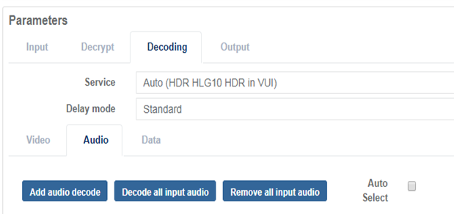
-
Select the Auto select check box. All the audio components present on the incoming service are automatically decoded and output as stereo components.
Add an audio to decode (optional)
Before you start, ensure:
- At least one Receiver service is configured.
- Video decoding is configured.
A maximum number of 8 audio components (stereo pairs) can be decoded simultaneously for a single receiver service. Across multiple receiver services a maximum of 20 total audio services are allowed.
-
From the Home page, select the RECEIVER item from the required feed then click .
-
From the Parameters section, select the Decoding tab.
-
Select Audio to display audio decoding parameters. The first decoded audio is automatically given the reference name Audio 1. This reference is used when configuring the audio components.
See Decoding parameters descriptions for additional information.
-
Select an Input. The PID and language of the audio being decoded are shown in the Input column.
-
Select a Decode channel configuration.
Decode all input audio (optional)
Before you start, ensure:
- At least one Receiver service is configured.
- At least one audio component is configured.
A maximum number of 8 audio components (stereo pairs) can be decoded simultaneously for each decoded video service. Across multiple receiver services a maximum of 20 total audio services are allowed.
-
From the Home page, select the RECEIVER item from the required feed then click .
-
From the Parameters section, select the Decoding tab.
-
Select Audio to display audio decoding parameters.
-
Click Decode all input audio. The audio components that are not currently being decoded are added in the order that they are listed in the PMT (up to a maximum of 16 decodes per service). The defaults channel configuration is Stereo.
See Decoding parameters descriptions for additional information.
Delete an audio from a decode configuration (optional)
Before you start, ensure:
- At least one Receiver service is configured.
- Video decoding is configured.
A maximum number of 8 audio components (stereo pairs) can be decoded simultaneously for each decoded video service. Across multiple receiver services a maximum of 20 total audio services are allowed.
-
From the Home page, select the RECEIVER item from the required feed then click .
-
From the Parameters section, select the Decoding tab.
-
Select the Audio tab to display audio decoding parameters.
-
Click to delete an audio component or click Remove all decoded audio. The audio decode is now removed from both the list of decoded components and from any output configurations.
Phase-aligned audio
Currently the receiver does not support GUI selection of phase-aligned audio components from the input multi audios. Therefore, standard phased aligned audio language codes must be pre-configured for each audio group input (see note below for language codes).
To set up phase-aligned audio, follow these steps:
-
From the Home page, select the RECEIVER item from the required feed then click .
-
From the Parameters section, select the Decoding tab.
-
After selecting the decode service, select Add audio decode to add each audio component of the PAA group.
The ordering of decoding is not important but assists in getting the embedding order correct.
For the first group, the ordering is by language descriptor:
- aaa - Original channels 1-2
- aac - Original channels 3-4
- aae - Original channels 5-6
- aag - Original channels 7-8 (if present)
For a second PAA group, the language descriptors are:
- bba - Original channels 1-2
- bbc - Original channels 3-4
- bbe - Original channels 5-6
- bbg - Original channels 7-8 (if present)
-
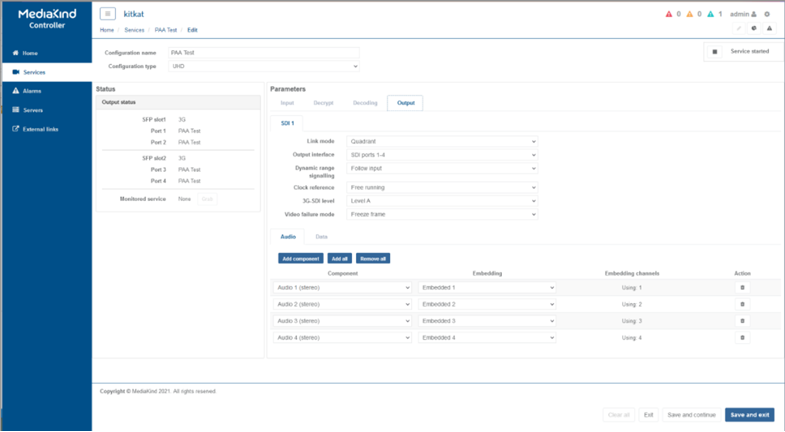
Select the Output tab.
-
Under the Audio tab, click Add component to add the audio components.
- The components are numbered as per the ordering of the decode.
- The order of the items in the list is unimportant, the assignment of Component to Embedding determines the output ordering. i.e., if Audio 1 on the Decoding tab was assigned language aaa, then that is Audio 1 on the Output->Audio tab.
- Here the channel mapping should match the assigned decoders, for each language, to recreate the original channel ordering.
| Decoding | Output | ||
|---|---|---|---|
| Name | Input | Component | Embedding |
| Audio 1 | Aaa | Audio 1 | Embedded 1 |
| Audio 2 | Aac | Audio 2 | Embedded 2 |
| Audio 3 | Aae | Audio 3 | Embedded 3 |
| Audio 4 | Aag | Audio 4 | Embedded 4 |
| Audio 5 | bba | Audio 5 | Embedded 5 |
| Audio 6 | bbc | Audio 6 | Embedded 6 |
| Audio 7 | bbe | Audio 7 | Embedded 7 |
| Audio 8 | bbg | Audio 9 | Embedded 8 |
Data decoding
Data formats
| Format | Output format |
|---|---|
| AFD/BAR data | SMPTE 2016 |
| Teletext | OP47/SMPTE 2031 |
| Closed Captions | SMPTE 334M for EIA–708-B |
| Time code | SMPTE 12M + RP188 |
| Generic VANC | SMPTE 2038 |
| SCTE-35 | SCTE-104 |
The Receiver service currently supports the following data types:
- Closed Captions
- Teletext
- Time code
- AFD
- Generic data
Data is carried within the transport stream in 1 or 2 possible ways, depending on the type of data.
- Encapsulated in the video component as SEI (H.264 / H.265) or USER data (MPEG2)
- On a separate data PID
A maximum of 8 data components can be decoded at any one time for each decode type Receiver service.
Configure data decoding
The section explains how to decode data that is carried on a separate PID.
-
From the Home page, select the RECEIVER item from the required feed then click .
-
From the Parameters section, select the Decoding tab.

See Decoding parameters descriptions for additional information.
-
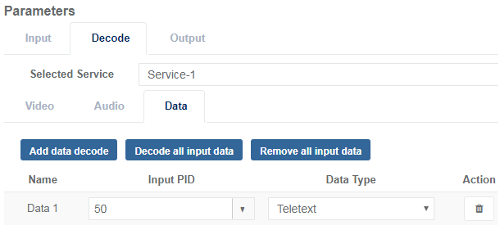
Select Data to display data decoding parameters.
-
Add an additional data component to decode.
-
Select an Input PID. If the selected PID is present in the PMT then the receiver attempts to decode any data on that PID. You can choose to manually enter a PID.
-
Select a Data type.
Add a data decoding
-
From the Home page, select the RECEIVER item from the required feed then click .
-
From the Parameters section, select the Decoding tab.
See Decoding parameters descriptions for additional information.
-
Select Data to display data decoding parameters.
-
Click Add data decode. A new data displays in the list.
-
Configure data decoding parameters.
Decode all input data
Before you start, ensure:
- At least one Receiver service is configured.
- Video decoding is configured.
A maximum number of 8 audio components (stereo pairs) can be decoded simultaneously for each decoded video service.
-
From the Home page, select the RECEIVER item from the required feed then click .
-
From the Parameters section, select the Decoding tab.
See Decoding parameters descriptions for additional information.
-
Select Data to display parameters.
-
Click Decode all input data. All the data components for the selected service that are not currently being decoded are added in the order that they are listed in the PMT (a maximum of 8 decodes per service). The default Data type is set to Ancillary.
Delete data from a decoding configuration
Before you start, ensure:
- At least one Receiver service is configured.
- At least one data input is configured for decoding.
-
From the Home page, select the RECEIVER item from the required feed then click .
-
From the Parameters section select the Decoding tab.
-
Select Data to display data decoding parameters.
-
Click to delete a data from the decoding or click Remove all input data.
Use of Multiple Receiver Service Types
Receiver services can be set to either an HD or a UHD service type (other service types also exist). Multiple Receiver services may be configured depending upon the requirement (e.g. Up to 4 for HD decode services).
When decoding UHD only a single receiver service is possible.
Functional description:
- Each service is independently configured, and can be started, stopped, and edited without impacting other services.
- Any combination of HD video codec, frame rates or resolutions can be decoded (up to a maximum of 4 services).
- For a list of supported video standards see the supported decoding formats section of this document.
Edit a service type for an existing service
You can edit the service type for an existing Receiver service.
-
From the Home page, select the RECEIVER item from the required feed then click .
-
From the Configuration type value, select an option.
If a receiver is running multiple HD services, and one of the services is changed to UHD, then the UHD service will be stopped and blocked from restarting until all of the other HD services have been stopped.